
Category Home Staging & Sale Prep

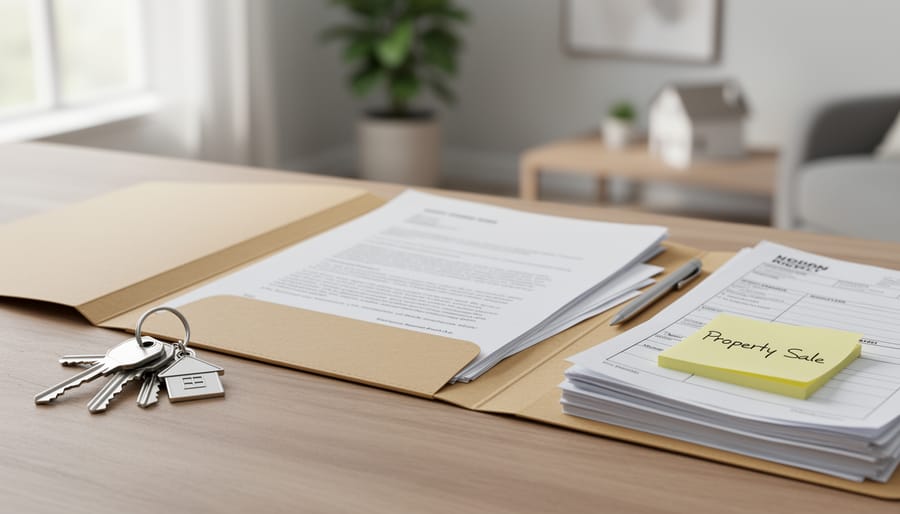
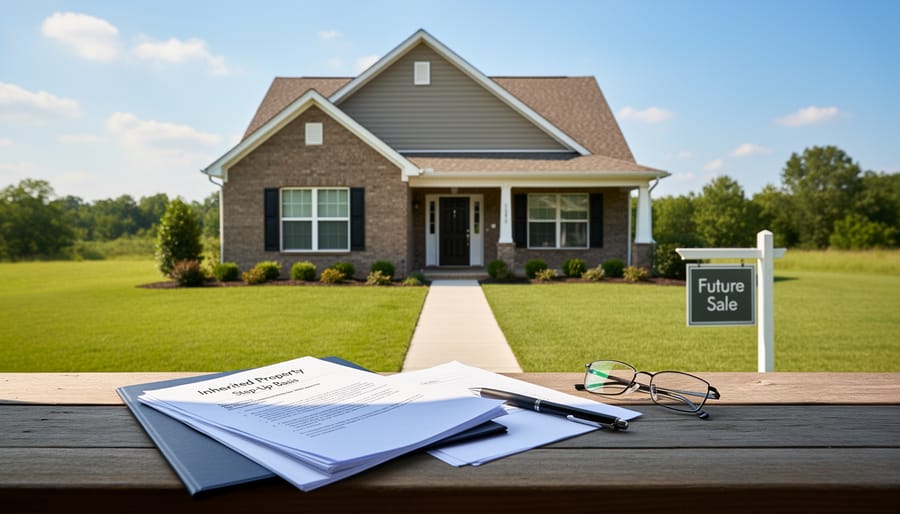
Inheritance documents and a house key placed on a porch step in front of a sunlit home, representing step-up basis when selling inherited property.

How to Calculate and Use Step-Up Basis When Selling Inherited Property

When you inherit property, the IRS automatically resets its cost basis to the fair market value on the date of the original owner’s death. This step-up in basis can save you thousands or even tens of thousands of dollars in capital gains tax when you sell. Instead of paying tax on appreciation that accumulated over the original owner’s entire period of ownership, you only owe capital gains on any increase in value from the inheritance date forward.

Here’s how it works in practice: If your parents bought their home in 1985 for $75,000 and it’s worth $425,000 when you inherit it, your basis becomes $425,000. Sell it a year later for $435,000, and you’re only taxed on $10,000 in gains, not the $360,000 your parents would have owed. That difference translates to real money staying in your pocket.

This tax benefit applies to most inherited property, including primary residences, vacation homes, and investment properties. The mechanics are straightforward, but getting them right requires proper documentation and understanding which valuation date to use, especially in community property states or when dealing with trusts.

The step-up basis rules changed significantly over the years, and there are specific situations where the benefit doesn’t apply or requires careful planning. If you’re managing an inherited property right now, knowing how to calculate your stepped-up basis correctly and what records the IRS expects you to keep will help you make informed decisions about timing the sale and maximizing your tax advantage.

Key Takeaway: Step-up basis allows you to inherit property at its current market value rather than what the deceased originally paid, which means you avoid capital gains tax on all the appreciation that happened during their ownership.

What Is Step-Up Basis and Why It Matters for Inherited Property

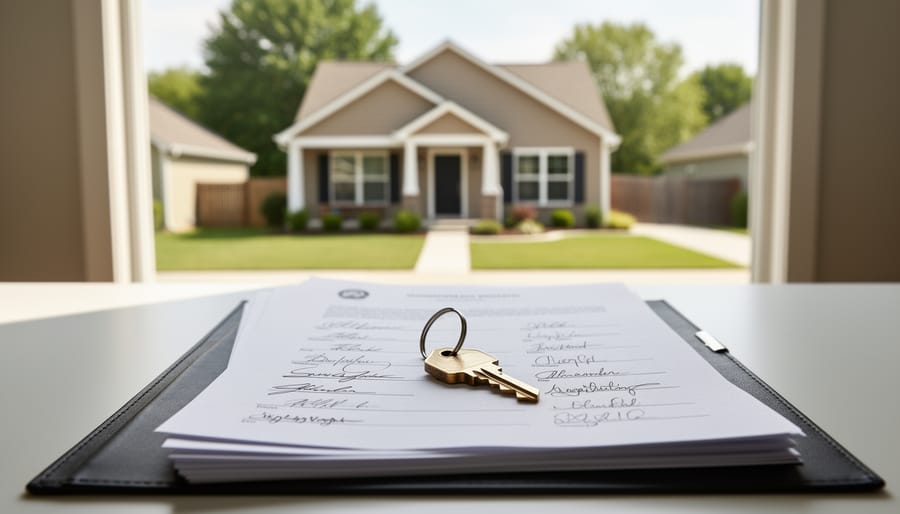
View of an inherited house exterior through a window from inside a home.
The inherited home stands in clear view, setting context for step-up basis when you plan to sell.

Step-up basis is a tax provision that resets your cost basis in inherited property to its fair market value on the date the previous owner passed away. Instead of inheriting the original purchase price the deceased paid decades ago, you get a fresh starting point at current market value. This matters enormously when you sell because capital gains taxes are calculated on the difference between your sale price and your cost basis, the higher your basis, the lower your taxable gain.

Here’s how it works in practice. Suppose your parents bought their home in 1985 for $80,000, and it’s worth $450,000 when they pass away in 2026. Without step-up basis, your cost basis would be their original $80,000 purchase price. If you sold the property for $450,000, you’d face capital gains tax on $370,000 of appreciation. With step-up basis, your new cost basis becomes $450,000, the fair market value at death. Sell it soon after for $450,000, and your taxable gain is zero.

This single provision can save inheritors tens of thousands of dollars in taxes. The larger the gap between original purchase price and current value, the more significant the benefit becomes. That’s why establishing an accurate date-of-death valuation is crucial before you list an inherited property for sale. Getting this number right protects you from unnecessary tax liability and ensures you’re not leaving money on the table when settlement time arrives.

What You’ll Need to Establish Step-Up Basis

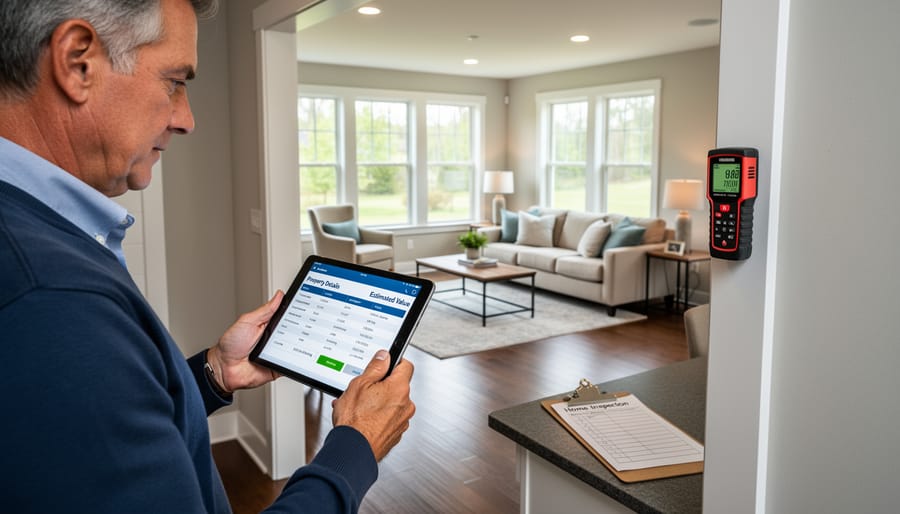
Person reviewing inherited estate documents in a home kitchen.
A calm moment reviewing inherited estate paperwork before selling a property.

Establishing proper documentation for your step-up basis isn’t just good practice, it’s essential protection if the IRS ever questions your reported capital gains. You’ll need specific documents and professional support to calculate the basis correctly and defend it years later when you file your tax return after selling.

Start gathering these core documents as soon as possible after inheriting the property:

  • Death certificate showing the official date of death, which establishes when the basis resets
  • Professional property appraisal or formal valuation completed as close to the date of death as possible
  • Property deed or title documents proving ownership transfer to you as the heir
  • Estate tax return (Form 706) if the estate was large enough to require filing
  • Original purchase documents from when the deceased bought the property, showing their cost basis
  • Contact information for a qualified CPA or tax advisor experienced with inherited property

The most critical item on this list is the professional appraisal. If the estate didn’t commission one within a reasonable window of the death date, you’ll need to obtain a retrospective appraisal, where a licensed appraiser determines what the property would have sold for on that specific past date. This costs more than a standard appraisal (typically $400, $800 depending on your market) because it requires additional comparable sales research for that historical period.

You’ll also want copies of any trust documents if the property was held in trust, probate court records if the estate went through probate, and property tax assessments from the year of death. These supporting documents help corroborate your appraisal value if questions arise. Don’t rely on online estimates or tax assessor values alone, the IRS expects a legitimate appraisal method, and assessor values often lag behind actual market values by months or years.

Important Warnings and Special Circumstances

Step-up basis comes with important exceptions and limitations that can significantly affect your tax outcome. Understanding these circumstances before you sell helps you avoid costly surprises and ensures you’re applying the rules correctly.

Community Property vs. Separate Property

If the property was located in a community property state (Arizona, California, Idaho, Louisiana, Nevada, New Mexico, Texas, Washington, or Wisconsin), you may receive a full step-up basis on the entire property, even if you only owned half. In community property, both halves of jointly-held property generally get stepped up when one spouse dies. By contrast, in common law states, only the deceased’s share receives the step-up if the property was held as joint tenants or tenants in common.

Property Transferred Before Death

Gifts made while the original owner was alive don’t qualify for step-up basis. If your parents transferred the property to you before death (perhaps to avoid probate), you receive their original cost basis through a “carryover basis” instead. This can result in much higher capital gains taxes when you sell. Property transferred during divorce proceedings similarly follows different basis rules, which you can explore further when selling during divorce.

Warning: Step-up basis is locked in at the date of death (or alternate valuation date if elected); any improvements you make or market appreciation after inheritance doesn’t change the stepped-up basis amount.

Joint Ownership Complications

How the property was titled matters enormously. Joint tenancy with rights of survivorship, tenancy by the entirety, and tenancy in common each have different step-up rules. If you inherited as a surviving joint tenant, typically only the deceased owner’s percentage receives a step-up. Sole ownership by the decedent provides the cleanest step-up scenario.

Always consult a tax professional if your situation involves joint ownership, community property, or property received before death. These exceptions can dramatically change your tax liability.

Step-by-Step: How to Calculate Your Step-Up Basis

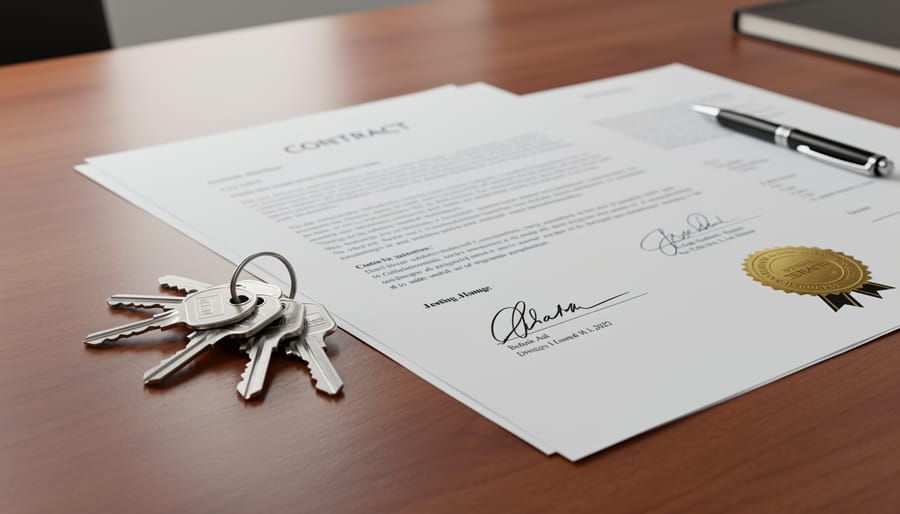
Macro close-up of a brass key on property documents and a deed envelope.
A key and property paperwork symbolize getting ready to calculate the stepped-up basis for a sale.

Calculating your step-up basis requires a methodical approach to ensure accuracy and proper documentation for tax purposes. The process is straightforward if you follow these steps in order and gather the right information along the way.

  1. Determine the exact date of death. This is your valuation date for step-up basis purposes. The executor or estate administrator should have this documented in estate records. In some cases, estates can elect an alternate valuation date six months after death, but this requires specific IRS forms and circumstances.
  2. Obtain a professional appraisal or use the estate’s valuation. Hire a licensed real estate appraiser to determine the property’s fair market value as of the date of death. If the estate already had the property appraised for probate purposes, you can typically use that same valuation. The appraisal should be thorough and defensible in case of an IRS audit.
  3. Check the ownership structure. Review how the deceased held title to the property. If it was community property, both halves typically receive a step-up in basis. For joint tenancy with rights of survivorship, only the deceased’s portion gets stepped up. Sole ownership properties receive a full step-up for the entire property value.
  4. Calculate your percentage if there are multiple heirs. If you’re one of several beneficiaries, determine your ownership share from the will or trust documents. Your stepped-up basis equals the total property value at death multiplied by your inheritance percentage. For example, if the property was valued at $500,000 and you inherited a one-third share, your stepped-up basis is $166,667.
  5. Document the stepped-up basis in writing. Create a clear record that includes the date of death, the appraisal report, your ownership percentage, and the calculated basis amount. Keep copies of the death certificate, appraisal, estate documents, and any probate records with these calculations.
  6. Consult with a tax professional to verify your calculation. A CPA or tax attorney who specializes in estate and real estate taxation can review your work, confirm you’ve applied the rules correctly for your specific situation, and advise on any state-specific considerations that might affect your basis.

Once you complete these steps, you’ll have a defensible stepped-up basis that serves as your new cost basis for the property. This becomes the foundation for calculating any capital gains when you eventually sell. Keep all documentation organized and accessible, as the IRS may request proof of your basis calculation years after the inheritance if you’re audited following a sale.

Applying Step-Up Basis When You Sell the Inherited Property

When you’re ready to sell your inherited property, the step-up basis becomes your most powerful tax-saving tool. The calculation is straightforward: take your sale price, subtract your stepped-up basis (the fair market value at the date of death), then subtract your selling costs to determine your taxable capital gain.

Here’s how it works in practice. Let’s say you inherited a home valued at $400,000 when your parent passed away in January 2026. You decide to sell it nine months later for $415,000. Your selling costs, including real estate commissions, title fees, and closing expenses, total $28,000. Your capital gains calculation looks like this: $415,000 (sale price) minus $400,000 (stepped-up basis) minus $28,000 (selling costs) equals $−13,000. That’s actually a capital loss, meaning you owe zero capital gains tax and may be able to deduct the loss against other capital gains.

Tip: If you sell quickly after inheriting, you may have little to no capital gains due to step-up basis, making it an ideal time to sell if you don’t plan to keep the property.

Now consider a different scenario where you hold the property longer. You inherit that same $400,000 home, but you wait three years before selling. During that time, the market heats up and you sell for $480,000 with $32,000 in selling costs. Your calculation: $480,000 minus $400,000 minus $32,000 equals $48,000 in taxable capital gains. Without the step-up basis, you’d have calculated gains from your parent’s original purchase price, potentially decades ago, which could have resulted in a six-figure tax bill instead.

Your selling costs are fully deductible and include more than just the agent commission. Count your curb appeal strategieshome staging costs professional photography, inspection repairs you made to close the sale, title insurance, escrow fees, and any transfer taxes. Keep detailed receipts for everything, these expenses directly reduce your taxable gain.

The stepped-up basis resets your starting point to the inheritance date, effectively erasing all the appreciation that occurred during the original owner’s lifetime. That’s the benefit, and it applies whether you sell immediately or years later.

Verifying Your Calculation and Next Steps

Person in a home office carefully reviewing notes with an open laptop nearby.
Careful review with the guidance of a tax professional helps ensure the stepped-up basis calculation is documented correctly.

Once you’ve calculated your step-up basis, proper verification prevents costly errors and protects you during an IRS audit. Start by cross-checking your date-of-death valuation against comparable sales from that specific time period. Real estate values can shift significantly even within a few months, so precision matters.

Schedule a consultation with a CPA or tax attorney who specializes in estate and capital gains taxes. Bring your complete documentation package: the professional appraisal, estate inventory, property records, and your calculation worksheet. They’ll verify your math, confirm you’ve applied the correct basis rules for your ownership situation, and identify any selling costs you can legitimately add to reduce your taxable gain.

Keep meticulous records organized in both physical and digital formats. The IRS can request documentation for up to three years after you file, or six years if they suspect significant underreporting. Your permanent file should include the original appraisal, probate documents establishing the date of death, closing statements from the sale, receipts for improvements made between inheritance and sale, and all correspondence with tax professionals.

When you sell, you’ll report the transaction on Schedule D (Capital Gains and Losses) and Form 8949 (Sales and Other Dispositions of Capital Assets) with your tax return for that year. Your stepped-up basis becomes the cost basis on these forms.

Before listing the property, consider how presentation affects your net proceeds. Professional preparation, including high-quality staging pictures, can significantly increase your sale price, maximizing the benefit of your favorable tax position. Work with a real estate professional experienced in inherited property sales who understands the timeline pressures executors face and can coordinate with your estate attorney to ensure a smooth closing.

What You Need

Before you begin calculating your step-up basis, gather these essential items to streamline the process and ensure accurate documentation:

Required Documents:
– Death certificate (certified copy)
– Property deed showing ownership transfer
– Estate documents (will, trust documents, or probate court orders)
– Property tax assessments from the year of death
– Any existing appraisals or valuations

Professional Services:
– Qualified real estate appraiser licensed in your state
– Estate attorney or probate lawyer
– Tax professional or CPA experienced with inherited property

Financial Records:
– Mortgage statements if debt existed at death
– Home improvement receipts from the deceased’s ownership
– Property insurance records
– HOA documents if applicable

For Sale Preparation:
– Recent comparable sales data in the neighborhood
– Current property condition assessment
– List of needed repairs or updates
– If you’re planning to sell soon, consider staging tips to maximize your property’s value

Having these materials organized upfront will save time when working with professionals and help ensure your step-up basis calculation is properly documented for tax purposes.

Common Questions About Step-Up Basis and Inherited Property

Do all heirs get the step-up basis, or just some?

All heirs who inherit a property share the stepped-up basis proportionally to their ownership percentage. If three siblings each inherit a third of the property, each gets a third of the stepped-up basis when calculating their individual capital gains upon sale.

What if no professional appraisal was done at the time of death?

You can still establish fair market value using alternative documentation like county tax assessments from that period, comparable sales data from the date of death, or a retrospective appraisal that determines what the property would have been worth at that specific date. The IRS accepts reasonable valuation methods as long as they’re properly documented.

How does step-up basis work if the inherited property was used as a rental?

The step-up basis applies to rental properties the same way it does to primary residences, the basis resets to fair market value at death. However, if you continue operating it as a rental after inheriting, you’ll calculate depreciation from the new stepped-up basis, and you won’t owe recapture tax on depreciation the original owner claimed.

Can I still use step-up basis if I live in the inherited home before selling?

Yes, you retain the step-up basis regardless of whether you sell immediately or live in the property first. Living in the home for two of the five years before sale may also qualify you for the primary residence capital gains exclusion of up to $250,000 (or $500,000 for married couples), which works in addition to the step-up basis benefit.

Does step-up basis apply if the property was in a trust?

Properties held in revocable living trusts typically receive full step-up basis at the grantor’s death, just like probate assets. Irrevocable trusts depend on the specific terms and when the property was transferred, some may not qualify for step-up basis at all.

What happens if I inherited property from someone who died years ago but I’m just now selling?

The step-up basis is locked in at the date of the original owner’s death, not when you decide to sell. You’ll still use the fair market value from that earlier date as your basis, which is why establishing and documenting that value at the time of inheritance is so important, even if you don’t plan to sell right away.

These questions cover the scenarios that trip up most people dealing with inherited property. The timing issue catches many heirs off guard, they assume the basis somehow updates over time or that delaying the sale changes the calculation. It doesn’t. Your cost basis is permanently set at the date of death, which means a property inherited in 2020 and sold in 2026 still uses the 2020 valuation.

The rental property question deserves special attention because it combines two tax concepts. You get the step-up benefit and a fresh depreciation schedule, which is about as close to a tax windfall as the code allows. If the original owner claimed $100,000 in depreciation over 20 years, that’s forgiven entirely. You start with the stepped-up value and depreciate from there if you keep renting it out.

Living in the home before selling opens a path to stack two major tax benefits. The step-up basis already reduces or eliminates the gain from the original purchase to death. The primary residence exclusion can then shelter up to $250,000 of any remaining gain from death to your eventual sale. It requires planning and a two-year commitment, but it’s worth considering if you have substantial appreciation post-inheritance.

Understanding step-up basis can mean the difference between a significant tax bill and keeping thousands of dollars from your inherited property sale. This tax benefit exists specifically to help heirs like you avoid being penalized for appreciation that occurred during the previous owner’s lifetime, appreciation you never actually experienced as gains.

While the concept itself is straightforward, getting the details right matters enormously. The IRS expects proper documentation, accurate valuations, and correctly calculated basis adjustments. Small errors in establishing your stepped-up basis can lead to overpaying taxes or, worse, facing penalties during an audit.

That’s why working with experienced professionals, a qualified appraiser, a CPA familiar with estate taxation, and potentially an estate attorney, isn’t optional. It’s essential. These experts ensure you’re capturing every dollar of tax benefit you’re entitled to while staying fully compliant with tax requirements.

If you’re ready to sell your inherited property and want guidance through the entire process, Your Home Tour specializes in helping homeowners navigate inherited property sales. We understand the unique challenges you’re facing and can connect you with the right professionals to maximize your financial outcome while minimizing stress and uncertainty.

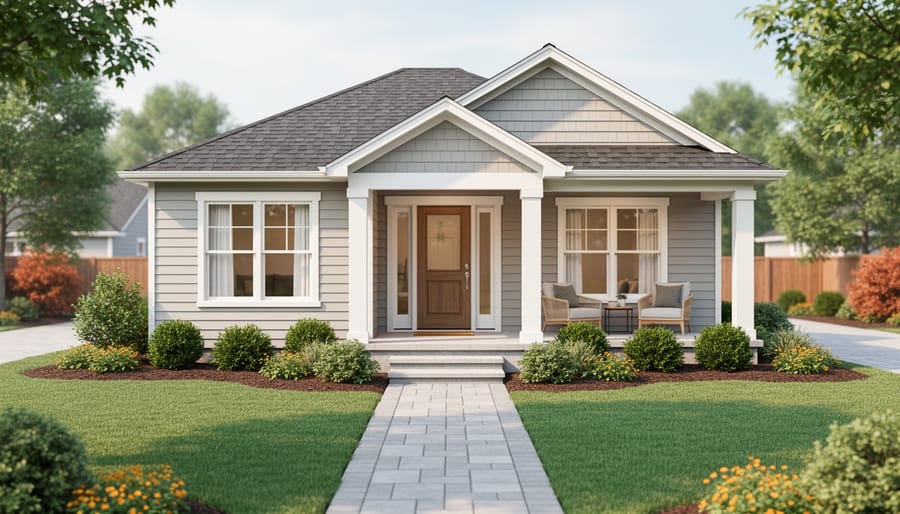
Well-maintained suburban home exterior with freshly groomed front yard landscaping, pathway, and inviting entryway in soft natural daylight

10 Business Curb Appeal Strategies for Faster Home Sales in 2026

Treating your home’s exterior as a business investment rather than a weekend project can return $1.50 to $2.00 for every dollar spent and cut market time by 30% or more. Business curb appeal means approaching front-yard improvements with the same strategic mindset you’d bring to any capital investment: tracking ROI, prioritizing high-impact changes, and making data-driven decisions about where your budget delivers the greatest return. Instead of randomly planting flowers or power-washing when you feel like it, you’ll analyze which upgrades buyers in your market value most, allocate resources based on measurable impact, and implement improvements on a timeline that maximizes sale price.

Key Takeaway: Shifting from casual home maintenance to strategic curb appeal investment transforms subjective “prettiness” into quantifiable value. Sellers who track spending, prioritize buyer preferences, and measure results consistently achieve faster sales and higher offers than those who upgrade based on personal taste alone.

The difference shows up immediately in listing photos, where professionally planned exteriors capture attention in the first three seconds of browsing. It continues through showings, where buyers assign higher baseline value to homes that look maintained and move-in ready. This systematic approach works whether you’re preparing to sell, building long-term property value, or managing rental portfolios where tenant quality correlates directly with exterior presentation.

You don’t need a real estate license or a contractor’s expertise to apply business principles to curb appeal. You need clarity on what moves the needle in your specific market, a framework for choosing between competing projects, and accountability for the dollars you spend. The strategies ahead break down exactly how professionals evaluate, budget for, and execute exterior improvements that pay back reliably.

Why Business Curb Appeal Matters for Home Sellers

When you approach your home sale as a transaction requiring strategic preparation, curb appeal shifts from cosmetic nicety to critical business asset. Research shows buyers form opinions in seconds after arriving at a property, and those initial reactions heavily influence their entire evaluation. Whether the showing happens in person or through listing photos, the exterior creates an immediate mental price tag that’s difficult to adjust once set.

The business mindset recognizes this psychological reality and treats curb appeal as part of your marketing strategy, not maintenance. Professional real estate investors routinely allocate 1-3% of expected sale price to exterior presentation because the return consistently exceeds the investment. Homes with strong curb appeal typically sell 7-10% faster and command higher offers as competing buyers perceive them as better maintained overall.

Note: Buyers typically form their first impression within 7-10 seconds of seeing your property, making that initial visual impact your most valuable marketing window.

What separates professional staging approaches from casual tidying is strategic thinking about your target buyer. Rather than simply mowing the lawn and cleaning gutters, you analyze what signals quality to your likely purchaser demographic. A young professional couple evaluates curb appeal differently than empty nesters or investors, and your improvements should align with their expectations. This means studying comparable homes that sold quickly in your neighborhood and identifying which exterior elements commanded premium pricing.

The business approach also involves measuring return on investment for each potential improvement. A fresh coat of paint on the front door might cost $150 but influence a buyer’s perception of a $400,000 home, while elaborate landscaping could run $5,000 without proportional impact. Strategic sellers make these calculations consciously rather than upgrading randomly based on personal preference or outdated conventional wisdom about what “should” be done before listing.

Selection Criteria: What Makes Curb Appeal Business-Ready

Treating curb appeal like a business investment means evaluating every potential improvement against clear criteria before you commit time or money. Not all exterior upgrades deliver equal returns, and the smartest sellers prioritize projects that match their specific property, market conditions, and timeline to sale.

Start with a simple cost-versus-impact analysis for each potential project. High-impact improvements don’t always cost the most, fresh mulch, power-washed concrete, and a painted front door typically deliver stronger visual returns than expensive landscaping overhauls. Calculate the expected increase in buyer interest or price against your actual outlay. A $300 door refresh that makes your home feel $15,000 more valuable in photos wins over a $2,000 garden renovation that buyers might replant anyway.

Your neighborhood sets the baseline expectations. Walk the street and note what well-maintained homes share: manicured lawns, matching mailbox styles, consistent fence conditions, or seasonal plantings. Matching these standards signals you’re a serious seller, while falling short raises red flags about deferred maintenance throughout the property. You don’t need the best lawn on the block, but you can’t have the worst and expect quick offers.

When evaluating which improvements make your curb appeal business-ready, apply these five criteria consistently:

  • ROI potential: Will this improvement increase perceived value more than it costs?
  • Time to complete: Can you finish before your target listing date without rushing quality?
  • Neighborhood alignment: Does this match or slightly exceed local property standards?
  • Buyer expectations: Will your target demographic notice and value this specific upgrade?
  • Seasonal timing: Does this project suit current weather and the season when buyers will view it?

Your target buyer demographic shapes which details matter most. Families with young children notice safe, maintained play spaces and well-lit entries. First-time buyers respond to move-in-ready presentation that suggests low maintenance ahead. Investors calculate repair costs at a glance, so visible deferred maintenance kills deals fast.

Competition analysis matters more than sellers realize. If three similar homes are listed within two blocks, your curb appeal needs a clear edge. That might mean the only professionally staged front porch, the freshest exterior paint, or the most inviting evening lighting. Check active listings online and drive by them, then identify one improvement that makes your property photograph better than theirs.

10 Business Curb Appeal Strategies for Faster Sales

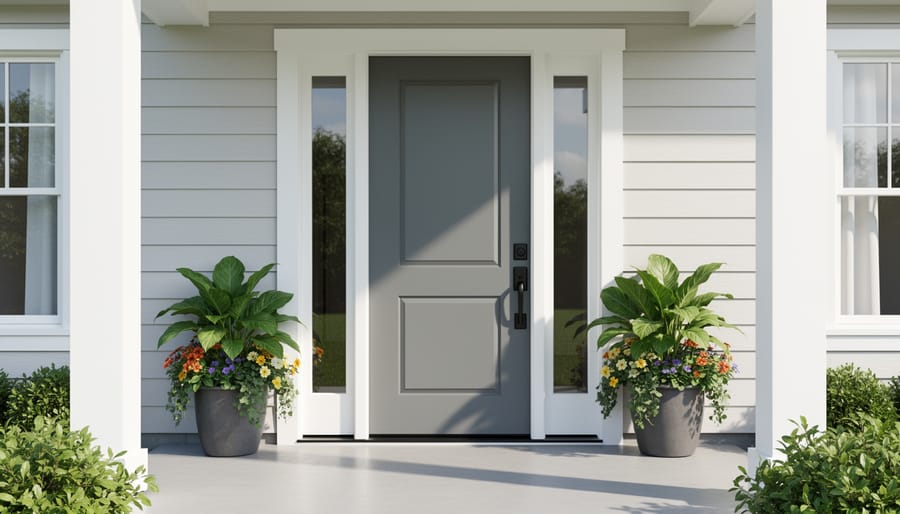
Front entry of a home with a clean door, modern hardware, and potted plants along a maintained walkway
A refreshed front entry with clean hardware and welcoming plants creates an immediate, professional first impression for buyers.

1. Professional Entry Presentation

The front door is your property’s handshake with potential buyers, and a weak first impression here costs you negotiating power. A fresh coat of paint in a color that complements your home’s exterior immediately signals recent care. Black, navy, or deep charcoal work across most architectural styles and photograph exceptionally well.

Replace outdated hardware, locksets, handles, house numbers, and the doorbell, with matching finishes. Brushed nickel and matte black deliver contemporary appeal without trend risk. Add a quality doormat and consider flanking planters with seasonal greenery scaled to your entryway size.

Remove personal items like worn welcome signs or faded seasonal wreaths. The goal is creating a clean, inviting transition point that suggests the interior matches this level of attention. Buyers mentally price your entire home based on what they see in these first five seconds.

2. Strategic Landscaping for Visual Flow

Strategic landscaping serves a single business purpose: directing buyer attention to your home’s architectural strengths while minimizing distractions. This isn’t about elaborate gardens, it’s about intentional visual pathways.

Start with aggressive pruning. Overgrown shrubs blocking windows or crowding the foundation make properties appear smaller and poorly maintained. Cut foundation plantings to below windowsill height, opening sightlines that showcase your home’s facade rather than hiding it behind greenery.

Edge all beds with crisp, defined lines. Buyers register sharp borders between lawn and landscaping as evidence of ongoing maintenance, a powerful signal that extends to their perception of the entire property’s condition.

For plantings, install low-maintenance perennials in odd-numbered groupings (three or five plants) that create visual stepping stones from the street to your entrance. Choose varieties that bloom during your expected sale window, adding color at decision-making moments.

Remove anything dead, diseased, or awkwardly shaped. Buyers won’t distinguish between “character tree” and “eyesore”, they’ll just register neglect.

3. Lighting That Works Day and Night

Lighting extends your curb appeal beyond daylight hours and creates emotional warmth that static staging cannot match. Install pathway lights along walkways and uplights at architectural features or mature trees, these guide buyers’ eyes and establish hierarchy in your landscape. A well-lit entry says “welcome home” during evening showings when buyers often visit after work. Replace dated fixtures with modern designs that complement your home’s style; a new porch light costs $150, $400 but photographs beautifully and signals recent updates. Add solar stakes along flower beds for affordable ambient glow. For listing photos, dusk shots with warm exterior lighting outperform daytime images in engagement metrics, your photographer needs something to capture. Strategic lighting makes your property feel safe, maintained, and move-in ready while competitors sit dark after 6 PM.

Warm exterior pathway and wall lights illuminating a home entrance at night
Exterior lighting that looks great day and night helps your home feel safe, inviting, and photo-ready for showings.
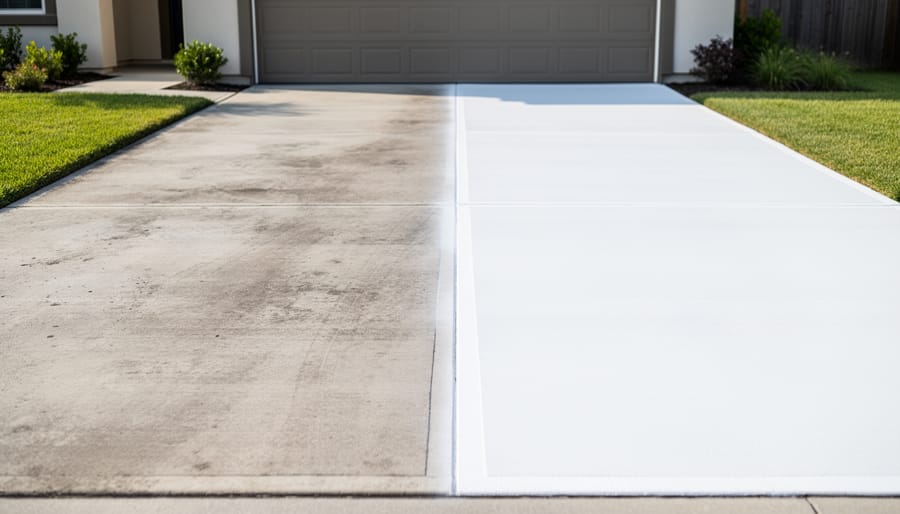
Clean wet concrete driveway with sharp edging and maintained landscaping
A well-maintained driveway signals consistent upkeep and removes visual friction that can turn buyers away.

4. Driveway and Walkway Maintenance

Driveways and walkways serve as literal pathways to your home, and their condition telegraphs your overall maintenance standards before buyers reach the front door. A cracked, stained, or weed-choked approach undermines even the most polished landscaping.

Power washing concrete or pavers removes years of grime, oil stains, and organic buildup in hours, often the single highest-impact improvement per dollar spent. Follow with crack filling and patching for asphalt or concrete surfaces, which prevents the “deferred maintenance” red flag that spooks cautious buyers.

Edge walkways cleanly where they meet lawn or mulch beds; crisp borders signal intentional care. Repair sunken pavers or loose stones that create trip hazards and insurance concerns. For stubborn stains, consider concrete staining or resurfacing rather than replacement if the structural integrity remains sound.

These surfaces frame every showing arrival. Clean, well-maintained pathways communicate that the entire property has received similar attention.

5. Exterior Paint and Finish Touch-Ups

A fresh coat of paint delivers one of the highest visual returns in curb appeal, but strategic touch-ups often achieve the same impact at a fraction of full-repainting costs. Focus on high-contrast elements that frame your home’s architecture: trim around windows and doors, shutters, porch railings, and decorative elements like columns or brackets. These accents draw the eye and make the entire facade appear updated.

Walk your property’s perimeter and photograph areas where paint has faded, chipped, or discolored. Peeling paint signals deferred maintenance to buyers, triggering concerns about what else might be neglected. Prioritize south and west-facing surfaces that weather fastest.

For maximum impact, choose colors that complement your neighborhood while standing out subtly. A crisp white or contrasting dark tone on trim against neutral siding creates definition in listing photos. Test paint samples in different lighting conditions before committing, colors shift dramatically between morning and afternoon sun.

Budget two weekends for preparation and application if you’re handling this yourself, or hire a painter for detail work while managing broader DIY projects elsewhere.

6. Window Presentation from the Street

Windows are your home’s eyes from the street, buyers unconsciously read them as indicators of interior care and livability. Start with spotless glass inside and out, particularly on street-facing panes where smudges and water spots kill the polished look you’re building. Clean windows catch light beautifully in listing photos and suggest meticulous maintenance throughout.

Coordinate window treatments so they present uniformly from outside. Mismatched or broken blinds signal neglect, while cohesive treatments in neutral tones create visual harmony across the facade. Open treatments during showings to maximize natural light visibility from curb.

Strategic seasonal touches add warmth without clutter, a single tasteful wreath or simple window box can soften architectural lines. Keep it understated; the goal is inviting, not busy. Clean, coordinated windows tell buyers the home has been cared for where it counts.

7. Mailbox and Address Number Upgrade

Buyers notice small details that signal whether a property has been maintained with care or allowed to deteriorate. Your mailbox and address numbers fall into this category, they’re functional necessities that also broadcast a message about the home’s overall condition.

A rusted mailbox with peeling paint or faded, misaligned house numbers suggest deferred maintenance throughout the property. Conversely, a clean modern mailbox and crisp address numbers tell buyers this home has been cared for systematically.

Replace dated brass or worn plastic mailboxes with contemporary designs that match your home’s architectural style. Modern farmhouse? Choose matte black metal. Traditional colonial? Opt for classic post-mount styles in coordinating finishes.

Address numbers deserve equal attention. Large, clearly visible numbers in a modern font (minimum four inches tall) improve curb presence while serving practical purposes for showings. Mount them directly on the house where they catch natural light, or illuminate them for evening visibility. Brushed nickel, oil-rubbed bronze, or matte black finishes typically photograph well and coordinate with most exterior color schemes.

8. Garage Door Impact

For most homes, the garage door commands 30-40% of the facade’s visible square footage from the street. A dingy, peeling, or outdated garage door broadcasts deferred maintenance louder than any other single element, and buyers notice immediately during drive-bys.

Start with a thorough cleaning: power wash to remove grime, mildew, and oxidation that dulls the finish. If the door is painted wood or steel, inspect for chips and rust spots. A fresh coat in a neutral color that complements the home’s palette costs $150-300 for materials and delivers dramatic visual lift.

Hardware upgrades offer quick wins. Replace dated handles, hinges (or decorative hinge overlays), and window inserts for $75-200. Carriage-style hardware kits transform flat doors into architectural features without replacement costs.

If the door is severely damaged or doesn’t match neighborhood standards, replacement ($800-1,500 installed) pays back in faster sales. Buyers interpret a modern, well-maintained garage door as evidence the entire property has been cared for properly.

9. Seasonal and Weather-Ready Presentation

Buyers evaluate homes differently across seasons, and smart sellers adjust their curb appeal strategy accordingly. In spring and summer, vibrant plantings and lush lawns signal move-in readiness. Fall demands leaf removal, seasonal color through mums or pumpkins, and clear gutters that prove maintenance diligence. Winter presents the toughest challenge, keep walkways clear, add welcoming touches like wreaths or evergreen planters, and ensure exterior lighting compensates for shorter daylight hours.

Weather damage tells buyers you’ve deferred maintenance. After storms, immediately clear debris, repair minor damage, and restore landscaping. In regions with harsh conditions, weatherproofing elements like sealed decks or protected entryways demonstrate smart ownership. Your curb appeal should prove the home performs well year-round, not just during ideal conditions. Seasonal adjustments cost little but signal that you’ve maintained the property through all conditions, a powerful message to serious buyers evaluating long-term value.

10. Professional Photography Staging

Most buyers will see your home online before they see it in person, which means your curb appeal needs to photograph exceptionally well. Schedule your listing photography during the “golden hour”, early morning or late afternoon when natural light is soft and warm. Remove cars from the driveway and street view, clear away trash bins and garden hoses, and stage the entry with a subtle seasonal touch like a potted plant or wreath.

Consider how your home will look in the small thumbnail images buyers scroll through. Trim any branches blocking the facade, ensure your lawn is freshly mowed with visible stripes, and add definition with edging. Professional photographers often recommend watering the lawn an hour before the shoot for enhanced color saturation and shine.

Your front yard setup should create depth and visual interest. Position outdoor furniture at slight angles rather than flat against walls, and open curtains to show warm interior lighting through windows. These details transform standard listing photos into images that stop the scroll and generate showing requests.

Over-the-shoulder view of a photographer capturing a staged home exterior for real estate photos
This image represents how strategic staging and clean exterior details translate into compelling listing photos.

Budget and Timeline Planning

Smart curb appeal planning starts with treating your budget like a business investment, not a renovation project. The typical seller invests between $1,500 and $5,000 on exterior staging, though your specific allocation depends on home value, local competition, and current condition.

Start by calculating a target budget using the 1-3% rule: invest one to three percent of your home’s listing price in curb appeal improvements. A $400,000 home warrants $4,000 to $12,000 in strategic exterior work, while a $200,000 property might justify $2,000 to $6,000. This framework ensures your investment aligns with expected returns.

Break your budget into three tiers based on impact. High-impact essentials like professional cleaning, paint touch-ups, and landscape maintenance typically consume 50-60% of your budget. Medium-impact upgrades such as lighting or hardware improvements take 25-35%, while lower-cost finishing touches like address numbers or seasonal decor round out the remaining 10-15%.

The DIY versus professional decision hinges on time value and skill level. Professional services cost more upfront but deliver faster, more polished results. If your home sits in a competitive market where speed matters, hiring contractors accelerates your timeline from weeks to days. DIY approaches work well for maintenance tasks like weeding or cleaning but risk delays on technical work like electrical or painting.

Timeline planning should work backward from your listing date. Start six to eight weeks before listing for major work, four weeks for landscaping and painting, and two weeks for final staging details. Rush timelines compress quality and inflate costs, both bad business decisions when first impressions determine your sale price.

Common Questions About Business Curb Appeal

Most sellers approach curb appeal with similar concerns about investment, timing, and priorities. Understanding the business rationale behind common questions helps you make confident decisions that align with your sale timeline and budget constraints.

What’s the typical ROI on curb appeal investments?

Strategic curb appeal improvements typically return 100-200% of their cost in faster sales and higher offers, with entry presentation and landscaping delivering the strongest returns. The key is matching investments to your neighborhood’s price point and buyer expectations.

When should I start curb appeal improvements before listing?

Begin at least 4-6 weeks before your planned listing date to allow time for landscaping to settle, weather-dependent tasks to complete, and professional photography scheduling. Rush jobs often cost more and deliver weaker results than planned timelines.

Which improvements matter most in competitive markets?

Entry presentation, lighting, and professional landscaping create the strongest first impressions when multiple properties compete for the same buyers. These visible upgrades differentiate your listing in online photos and drive showing requests.

Should I hire professionals or tackle curb appeal myself?

Hire professionals for high-impact visible work like painting, major landscaping, and lighting installation where quality shows immediately. Reserve DIY efforts for maintenance tasks like cleaning, mulching, and minor touch-ups that don’t require specialized skills.

How much should I budget for business-level curb appeal?

Plan to invest 1-3% of your home’s value in curb appeal for competitive markets, with higher percentages for properties needing significant exterior updates. Start with the highest-impact, lowest-cost improvements and scale up based on your timeline and local competition.

Do seasonal factors affect which improvements I should prioritize?

Absolutely, spring sellers should focus on fresh landscaping and color, while winter listings need exceptional lighting and welcoming entry details to compensate for dormant gardens. Adjust your strategy to showcase your home’s best features in current conditions rather than fighting the season.

The business approach to curb appeal means treating these decisions like any investment analysis. Calculate potential return against cost, consider your specific market timing, and prioritize improvements that address buyer concerns visible in first impressions. Your real estate agent can provide local market data showing which exterior features buyers in your area value most, helping you allocate budget where it delivers the strongest competitive advantage.

items

1. Professional Entry Presentation

Your front door represents the threshold between public space and personal sanctuary, buyers judge your entire property by this transition point. Replace dated hardware with modern finishes, repaint the door in a color that complements your facade, and add a professional-grade welcome mat. Consider the sight lines: stepping back 15 feet reveals what buyers see first. A simple door refresh costs $200-500 but signals that quality continues inside.

2. Strategic Landscaping for Visual Flow

Professional landscapers design with intention, guiding eyes toward architectural strengths while softening harsh lines. Prune overgrown shrubs away from windows, edge beds with clean lines, and add seasonal color near the entry. The goal isn’t elaborate gardens but intentional framing. Strategic pruning and mulching typically runs $300-800 and creates visual pathways that make homes feel larger and more accessible.

3. Lighting That Works Day and Night

Evening showings require functional exterior lighting, while daytime photos benefit from fixtures that add architectural interest. Install pathway lights leading to the entry, upgrade porch fixtures to complement your home’s style, and ensure all bulbs match in color temperature. Quality exterior lighting ($400-1,200 installed) extends showing hours and creates warm ambiance that photographs sell.

4. Driveway and Walkway Maintenance

Cracked, stained concrete telegraphs deferred maintenance to buyers who extrapolate those concerns throughout the property. Power washing removes years of buildup for $150-300, while crack sealing and edging create crisp boundaries. If replacement is needed, concrete runs $8-12 per square foot, but surface treatments like resurfacing cost half that while delivering similar visual impact.

5. Exterior Paint and Finish Touch-Ups

Full repainting costs thousands, but targeted touch-ups on trim, shutters, and high-visibility areas refresh the entire facade for $300-700. Focus on what buyers see from the curb: front-facing trim, porch railings, and any peeling areas. Choose neutral, regionally-appropriate colors that photograph well and appeal to broad buyer demographics rather than personal preferences.

6. Window Presentation from the Street

Clean windows signal property care, while coordinated treatments create cohesive visual rhythm. Wash exterior glass ($150-300 professionally), align blinds at consistent heights, and remove window-mounted air conditioners if possible. Simple seasonal wreaths or planters on front-facing windowsills add warmth without overwhelming the architecture, buyers notice these thoughtful details.

7. Mailbox and Address Number Upgrade

These small elements communicate whether owners maintain details or let things slide. Replace rusted mailboxes ($40-150), install modern house numbers with good visibility ($30-100), and ensure both coordinate with your home’s finish palette. Postal presentation matters, buyers imagine themselves receiving mail here, and dated fixtures undermine that vision.

8. Garage Door Impact

Garage doors occupy 30-40% of many facades, yet sellers often overlook this massive visual element. Power washing removes grime ($100-200), fresh paint or stain revives wood doors ($200-400), and updated hardware adds dimension. If replacement is needed, modern insulated doors ($1,000-3,000 installed) deliver strong ROI by transforming the home’s entire street presence.

9. Seasonal and Weather-Ready Presentation

Spring sellers showcase blooms; winter sellers emphasize coziness and maintenance. Adjust your curb strategy to season: clear leaves and debris, store seasonal items like patio furniture, and demonstrate weather preparedness with clean gutters and functioning drainage. Seasonal adjustments cost minimal money but signal that the home is actively maintained year-round.

10. Professional Photography Staging

Listing photos drive 90% of buyer interest, so stage specifically for the camera. Remove cars from driveways, open front curtains, turn on interior lights visible through windows, and photograph during golden hour when natural light flatters exteriors. Professional real estate photography ($200-500) captures these staging investments and multiplies their impact across thousands of online viewers.

Treating your home’s exterior with a business mindset transforms curb appeal from decoration into strategic investment. The ten strategies we covered deliver measurable returns because they address what buyers actually notice in those critical first moments, professional presentation signals quality throughout the property and justifies asking price in competitive markets.

Every improvement you make compounds: a refreshed entry paired with strategic lighting and maintained walkways tells a coherent story of careful ownership. Buyers spend less time questioning maintenance issues and more time imagining themselves in the space. That shift accelerates decisions and strengthens offers.

The timeline matters more than perfection. Implementing even half these strategies puts your listing ahead of neighboring properties still treating curb appeal as an afterthought. Start with the highest-impact, lowest-cost fixes like address numbers and mailbox upgrades, then layer in landscaping and lighting based on your market timeline and budget.

Think of exterior staging as your sales pitch before buyers even reach the door. You wouldn’t launch a product without packaging strategy, your home deserves the same business discipline. The fastest sales happen when presentation matches price positioning from the curb inward.

Ready to create your customized curb appeal strategy? Our team provides free consultations to help you prioritize improvements for your specific property and market conditions. Contact us today to develop your business plan for faster sale results.

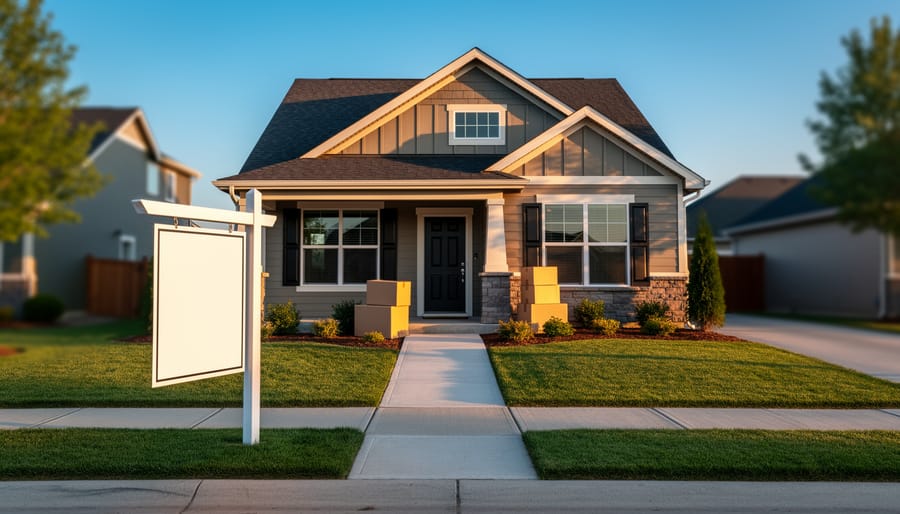
Suburban house at golden hour with a blank real estate sign in the front yard and sealed moving boxes by the porch, viewed straight-on from the curb.

Selling Your House During Divorce Without Losing Your Sanity (or Money)

Understand your legal rights before making any decisions about your marital home. In most states, the house is considered marital property regardless of whose name appears on the deed, meaning both spouses typically have equal claim to proceeds from the sale. Contact a family law attorney immediately to clarify your specific situation, as laws vary significantly by state and can impact everything from timing to profit distribution.

Get a professional appraisal to establish the home’s current market value. This objective assessment prevents disputes over listing price and ensures both parties receive fair compensation. Request this evaluation early in the divorce process, as property values can fluctuate and you’ll need this figure for settlement negotiations and potential buyout scenarios.

Decide between three primary options: selling the home and splitting proceeds, one spouse buying out the other’s equity, or postponing the sale until market conditions improve or children reach certain milestones. Each choice carries distinct financial and emotional implications. Selling typically provides the cleanest break and eliminates ongoing joint financial obligations, while a buyout allows one spouse to maintain stability and potentially build equity.

Separate emotion from financial decisions throughout this process. While your home holds memories and represents years of investment, approaching the sale strategically protects your financial future. Consider working with a real estate professional experienced in divorce sales who understands the unique challenges of coordinating between two households, managing tight timelines, and maintaining neutrality during what’s often a stressful transition.
Suburban house with for sale sign in front yard
Selling the marital home is often one of the most significant decisions couples face during divorce proceedings.

Understanding Your Options: What Happens to the House in a Divorce?

When divorce brings you to the difficult decision of what to do with your shared home, you’re facing three primary paths forward. Each option comes with its own financial implications and emotional considerations, and understanding them clearly can help you make the best choice for your situation.

The first and often most straightforward option is selling the house and dividing the proceeds. This approach provides a clean break, allowing both parties to start fresh without ongoing financial ties. It’s particularly practical when neither spouse can afford the mortgage independently or when you both want to move forward without shared assets. Selling converts your home equity into cash that can be split according to your divorce agreement or state property division laws.

Another common route is a buyout, where one spouse purchases the other’s share of the home equity. This works well when one person wants to stay in the home, perhaps to maintain stability for children or because of emotional attachment. The staying spouse typically needs to refinance the mortgage in their name alone and pay the departing spouse their portion of the equity. Keep in mind that qualifying for a new mortgage on a single income can be challenging.

The third option, continuing to co-own the property after divorce, is less common but sometimes necessary. Some couples choose this temporarily until the market improves or children graduate, while others maintain it as a rental investment. This requires ongoing cooperation and shared financial responsibility, which isn’t ideal for everyone.

Several factors influence which path makes sense for you: your current financial situations, local real estate market conditions, whether children are involved, and your ability to communicate and cooperate post-divorce. Consider consulting with both a divorce attorney and a real estate professional to evaluate your specific circumstances and make an informed decision that protects your financial future.

The Legal Side: Protecting Your Interests Before You List

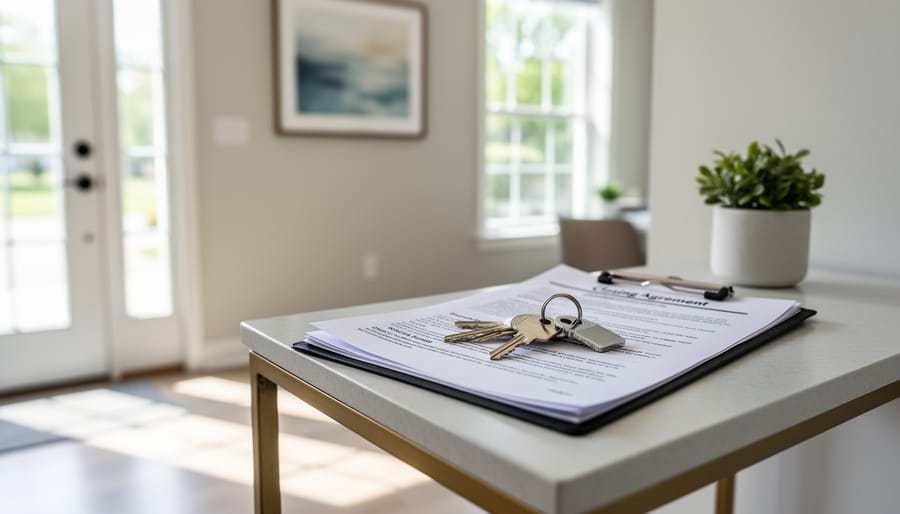
Hands signing legal documents with house keys and property papers on desk
Legal documentation and formal agreements protect both parties’ interests when selling property during divorce.

Getting an Accurate Home Valuation

Getting an accurate home valuation is one of the most important steps when selling your house during a divorce. An independent, professional appraisal provides an objective foundation for negotiations and helps prevent disputes down the road.

During divorce proceedings, emotions can cloud judgment, and one spouse may overvalue the home while the other undervalues it. A licensed appraiser who specializes in your local market brings professional expertise and unbiased data to the table. They’ll consider comparable sales, current market conditions, your home’s condition, and recent improvements to determine fair market value.

To ensure both parties trust the results, consider hiring an appraiser together. Look for someone with strong credentials, local experience, and no prior relationship with either spouse. The American Society of Appraisers and the Appraisal Institute maintain directories of qualified professionals. Request references and verify their licensing status with your state’s regulatory board.

If you disagree on the home’s value even after an appraisal, you have options. Some couples choose to get a second opinion from another appraiser and average the two results. Others agree to let their attorneys or a mediator help resolve the difference. In some cases, getting multiple broker price opinions from local real estate agents can provide additional perspective.

Remember, an accurate valuation protects both parties financially and creates a fair starting point for dividing your assets. While there’s typically a cost involved, professional appraisals are worth the investment for peace of mind during this challenging transition.

Timeline Considerations and Court Orders

Timing your home sale around divorce proceedings requires careful coordination with your attorney and the court system. In many cases, judges will issue specific orders regarding when and how the property must be sold, and these court-mandated deadlines aren’t optional. You’ll need to work within these timeframes, which can sometimes feel rushed or inconveniently timed with market conditions.

The best approach is to discuss sale timing early in your divorce proceedings. Some couples choose to list the house before finalizing the divorce, allowing them to split proceeds and move forward separately. Others wait until after the decree is finalized, though this can delay both parties from accessing their equity and moving on.

Keep in mind that divorce timelines vary significantly by state and case complexity. Your sale might need to happen quickly if the court orders it, or you might have flexibility to wait for better market conditions. Communication between your divorce attorney and real estate agent is essential here.

If you’re facing tight deadlines or need to sell quickly due to court orders, consider all your options, including traditional listings and alternative sale methods that might expedite the process while meeting legal requirements.

Bright staged living room interior prepared for home sale
Properly preparing and staging your home helps maximize sale value even during emotionally challenging circumstances.

Preparing Your Home to Sell: When Emotions Run High

Who Handles What: Dividing Preparation Responsibilities

Dividing preparation responsibilities fairly starts with creating a clear written agreement about who handles what. Consider splitting tasks based on each person’s strengths, availability, and proximity to the property rather than defaulting to a 50-50 split of everything.

For repairs and improvements, get multiple quotes together and decide on a budget limit. One approach is to have one spouse manage contractors while the other handles administrative tasks like paperwork and scheduling showings. Document all expenses with receipts and keep a shared spreadsheet to track spending.

When it comes to home staging costs and ongoing maintenance, decide upfront how you’ll split these expenses. Some couples choose to deduct all preparation costs from sale proceeds before dividing equity, which simplifies tracking.

If one spouse remains in the home during the sale, they typically handle day-to-day maintenance like lawn care and keeping the property showing-ready. The other spouse might take responsibility for coordinating with the real estate agent and reviewing offers.

Remember to communicate through email or text to maintain clear records of decisions and agreements, which helps prevent disputes later.

Quick Cash Sales vs. Traditional Market Sales

When going through a divorce, deciding between a quick cash sale and traditional market listing depends on your specific priorities and circumstances. Understanding both options helps you make the best choice for your situation.

A cash sale offers significant advantages when speed matters most. If you and your spouse want to finalize the divorce quickly, selling for cash can close in as little as one to two weeks compared to the typical 30-60 days (or longer) with traditional sales. This faster timeline means you can divide proceeds sooner and move forward with your lives. Cash sales also eliminate the stress of preparing your home for multiple showings, which can be particularly challenging when emotions are already running high and you’re both still living in the property.

Additionally, cash buyers typically purchase homes as-is, saving you from costly repairs or updates that you and your spouse might disagree about funding. You’ll avoid the uncertainty of buyer financing falling through, which happens in roughly 8-10% of traditional sales.

However, traditional market sales generally yield higher prices, sometimes 10-20% more than cash offers. If maximizing your equity is the priority and you have time to wait, listing with a real estate agent makes sense.

Your Home Tour offers a cash buying service designed specifically for situations requiring quick, hassle-free transactions. We provide fair, transparent offers and can work around your timeline, making the divorce process just a bit easier during an already difficult time.

Managing the Selling Process as Co-Sellers

Selling your home during a divorce requires you and your ex-partner to collaborate, which can feel overwhelming when emotions are running high. The key to a successful sale is establishing clear boundaries and communication methods that keep the process moving forward.

Start by agreeing on a primary communication channel that feels comfortable for both parties. Some divorcing couples find email works best because it provides a written record and removes the pressure of face-to-face conversations. Others prefer communicating through their attorneys or a neutral third party. Whatever method you choose, keep all discussions focused strictly on the sale and avoid revisiting personal issues.

Create a decision-making protocol early in the process. Determine which decisions require mutual agreement (like accepting an offer or making major repairs) and which can be handled independently (like scheduling showings). Document these agreements in writing to prevent misunderstandings later.

Your real estate agent can serve as an invaluable mediator during this challenging time. Choose an agent experienced in divorce sales who understands the sensitivity involved. They can act as a neutral point of contact, presenting information objectively to both parties and helping facilitate compromises when disagreements arise. Schedule separate meetings with your agent if joint conversations become too difficult.

Consider designating one person as the primary contact for routine matters like coordinating showings or answering minor questions from the agent. This streamlines communication and reduces unnecessary back-and-forth.

Remember, you both share the common goal of selling the property efficiently and maximizing your return. Keeping this objective front and center can help you navigate disagreements more effectively and reach closing day with minimal conflict.

Financial Considerations: Maximizing Your Proceeds and Minimizing Taxes

Capital Gains Tax Exemptions for Divorcing Couples

When selling your marital home during divorce, understanding tax exemptions can save you thousands of dollars. The good news is that the IRS offers a primary residence exclusion that allows you to exclude up to $250,000 of capital gains if you’re filing as single, or $500,000 if you’re filing jointly as a married couple.

Here’s where timing becomes crucial. To qualify for this exclusion, you must have owned and lived in the home as your primary residence for at least two of the five years before the sale. If you’re still married when you sell, you can take advantage of the larger $500,000 exclusion by filing jointly. However, if the divorce finalizes before the sale, you’ll each only qualify for the $250,000 individual exclusion.

The capital gains exclusion rules can be complex when divorce is involved, especially if one spouse keeps the home temporarily as part of the settlement. In some cases, a spouse who moves out may still claim the exclusion if they sell within the required timeframe, but specific conditions must be met.

Because divorce settlements and tax implications vary widely based on your unique situation, it’s essential to consult with both a tax professional and your divorce attorney before finalizing any sale agreements. They can help you structure the sale timing and terms to maximize your tax benefits while protecting your financial interests during this challenging transition.

Common Pitfalls to Avoid When Selling During Divorce

Selling a home during divorce comes with unique challenges, and unfortunately, many couples make costly mistakes that prolong the process and reduce their proceeds. Being aware of these common pitfalls can help you navigate the sale more smoothly and protect your financial interests.

One of the biggest mistakes is letting emotions dictate pricing decisions. When hurt or anger enters the equation, one spouse might insist on an unrealistically high price to delay the sale, while the other might push for a quick sale at any cost. Both approaches can cost you thousands of dollars. Work with your real estate agent to set a fair market price based on comparable sales and current market conditions, not feelings.

Warning: Emotional pricing decisions can cost you tens of thousands in lost value or add months to your time on market, delaying your fresh start.

Another frequent error is refusing reasonable offers out of spite. If your ex-spouse supports an offer, don’t automatically reject it just to be difficult. Evaluate each offer objectively with your agent and attorney, focusing on your financial goals rather than scoring points in the divorce.

Neglecting property maintenance is surprisingly common during divorce. When both parties have moved out or attention is focused elsewhere, the home can fall into disrepair. Overgrown yards, minor repairs left undone, and general uncleanliness can significantly reduce buyer interest and sale price. Establish a clear maintenance schedule and stick to it.

Communication breakdowns about showing schedules create unnecessary complications. If one spouse still lives in the home, coordinate showing times respectfully. Missing out on potential buyers because of scheduling conflicts or last-minute cancellations only extends the selling timeline.

Finally, don’t make major unilateral decisions about repairs, staging, or price reductions without consulting your ex-spouse and your attorney. These decisions affect both parties financially and legally, and proceeding without agreement can create additional legal complications in your divorce proceedings.

Working with the Right Real Estate Professional

Navigating a divorce sale requires a real estate professional who brings both expertise and emotional intelligence to the table. The right agent can make this challenging process significantly smoother by maintaining neutrality and ensuring both parties feel heard and respected throughout the transaction.

Look for an agent with specific experience handling divorce sales. These professionals understand the unique complexities involved, from coordinating with attorneys to managing heightened emotions during showings and negotiations. They should demonstrate strong communication skills and a commitment to transparency, keeping both spouses informed at every step.

When interviewing potential agents, ask pointed questions about their divorce sale experience. How many similar transactions have they handled? Can they provide references from divorced clients? How do they plan to communicate with both parties fairly? Will they work with your attorneys and mediators to ensure all legal requirements are met?

The ideal agent should also have connections to other helpful professionals, including appraisers, home inspectors, and staging experts. They might recommend professional staging to maximize your home’s appeal without breaking the bank during an already expensive time.

Most importantly, your agent should remain genuinely neutral, never taking sides or showing favoritism. They’re working for both of you to achieve the best possible outcome. A skilled divorce sale specialist will help minimize conflict, expedite the sale, and allow both parties to move forward with their lives.

Real estate agent consulting with couple at conference table
Working with an experienced real estate professional helps divorcing couples navigate the complexities of selling their shared property.

Selling your house during a divorce certainly comes with unique challenges, but it doesn’t have to be overwhelming. With the right approach, clear communication, and professional support, you can navigate this transition more smoothly than you might expect. The key is focusing on practical steps rather than letting emotions drive your decisions.

Remember that you’re not alone in this process. Many couples successfully sell their homes during divorce every year by staying organized, setting realistic expectations, and relying on experienced professionals who understand the complexities involved. Whether you choose a traditional sale, quick cash offer, or buyout arrangement, having a solid plan helps reduce stress and keeps things moving forward.

If you’re feeling uncertain about your next steps or need personalized guidance for your specific situation, we’re here to help. Your Home Tour offers free consultations to walk you through your options without any obligation. We understand that this is a sensitive time, and our goal is to provide clarity and support as you make important decisions about your property. Reach out today to discuss how we can make this process easier for you.

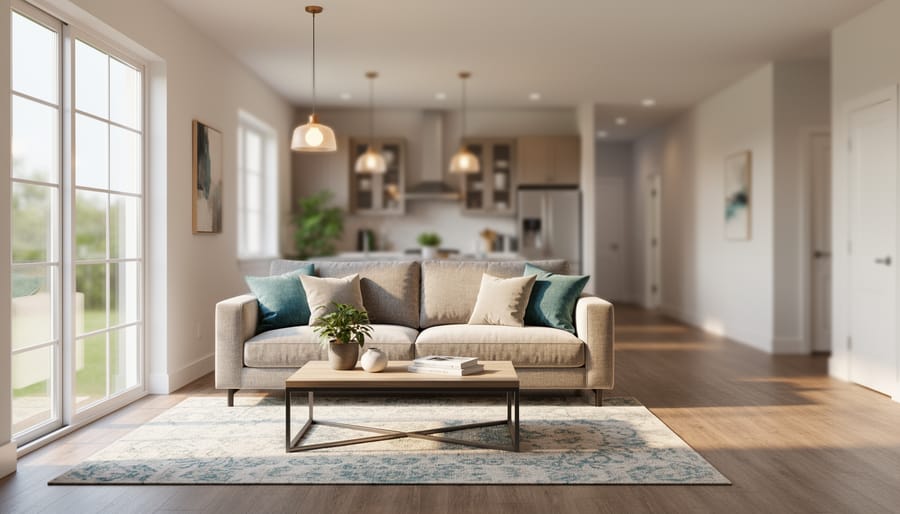
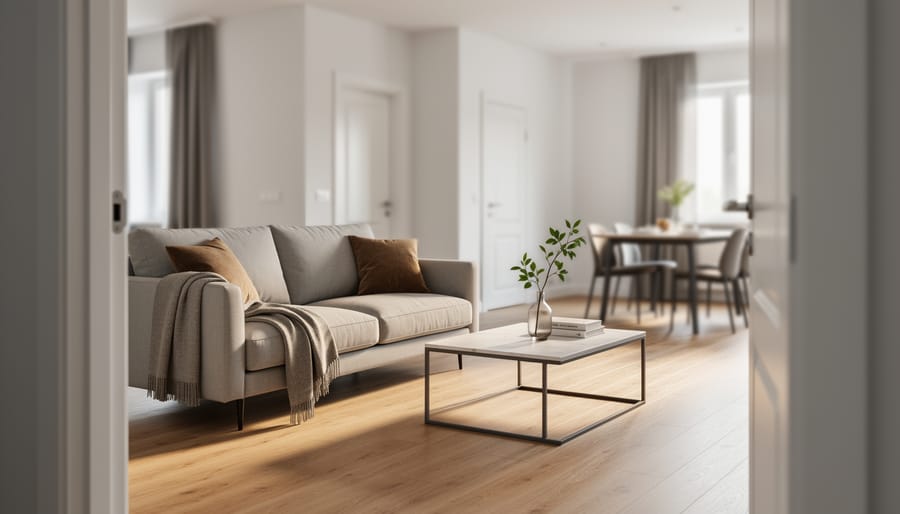
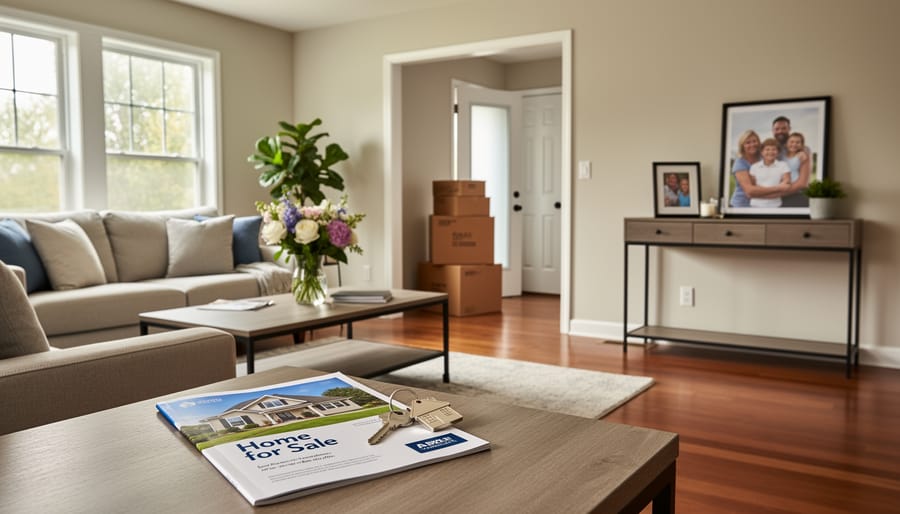
Budget-friendly staged living room with neutral sofa, wood coffee table, rug, and potted plant, sunlit from the left, with a tidy kitchen visible through an open doorway.

Home Staging Costs That Won’t Empty Your Wallet

Expect to invest between $1,500 and $10,000 for professional home staging, with most homeowners spending around $3,000 to $5,000 depending on home size and how many rooms need attention. The good news? You control these costs more than you think, and staging almost always delivers a solid return by helping homes sell faster and often for higher prices.

Start by staging only the rooms that matter most to buyers: living room, kitchen, master bedroom, and main bathroom. These high-impact spaces give you the biggest bang for your buck, while secondary bedrooms and bonus rooms can often work fine with simple decluttering and fresh arrangements of existing furniture.

Consider a consultation-only approach where a professional stager visits your home for $300 to $500, provides a detailed action plan, and you handle the implementation yourself using items you already own or affordable rentals. This hybrid strategy saves thousands while still giving you expert guidance on furniture placement, color choices, and which updates truly matter.

Request quotes from multiple staging companies and ask specifically about their pricing structure, whether they charge monthly or flat fees, and what their packages include. Many stagers offer flexible options like partial staging or room-by-room pricing that can fit tighter budgets without sacrificing the polished look buyers expect.

What Actually Drives Staging Costs

Professional Staging vs. DIY: The Real Numbers

Let’s break down what you’ll actually spend on staging your home, because real numbers help you make smart decisions.

Professional staging typically costs between $1,500 and $5,000 for an initial consultation and three-month rental period. For a 2,000-square-foot home, expect to pay around $2,500 to $3,500 to stage key areas like the living room, primary bedroom, and kitchen. This includes furniture rental, accessories, and the stager’s design expertise. If you’re staging a luxury property or need a full-house treatment, costs can climb to $10,000 or more.

The DIY route is considerably lighter on your wallet. You might spend $500 to $1,500 on new accessories, fresh paint, updated lighting fixtures, and maybe renting a few statement pieces. For example, one homeowner I know spent just $800 on decluttering services, new throw pillows, artwork, and strategically placed mirrors to brighten their space.

Here’s the real consideration: professional stagers bring expertise that can translate to higher offers. They know exactly what buyers in your market want to see. However, if your home is already well-maintained and you have a good eye for design, DIY staging can deliver impressive results at a fraction of the cost.
The sweet spot? A hybrid approach. Hire a professional for a two-hour consultation (around $200 to $500) to get expert recommendations, then execute the plan yourself. This gives you professional insights while keeping costs manageable and putting you in control of the transformation.

Smart Ways to Cut Staging Costs Without Cutting Corners

Focus on High-Impact Rooms First

Here’s the reality: you don’t need to stage every room in your home to see impressive results. Smart sellers focus their staging budget on the three spaces that matter most to buyers—the living room, kitchen, and master bedroom.

Why these three? They’re the rooms where buyers spend the most time during showings and can most easily envision themselves living. The living room sets the tone for the entire home and showcases your lifestyle spaces. The kitchen often makes or breaks a sale since it’s the heart of the home and a major investment concern for buyers. The master bedroom appeals to buyers’ desire for a personal retreat and restful space.

Research consistently shows that partial staging—focusing on these high-impact areas—delivers nearly the same return on investment as full-home staging, but at a fraction of the cost. You might spend $1,500 to $2,500 staging these three rooms compared to $3,000 to $6,000 for an entire house.

Think of it this way: buyers will overlook a sparse guest bedroom if your living spaces look incredible. But they’ll struggle to see past a cluttered, outdated living room no matter how perfect the rest of your home appears.

If your budget allows, consider adding the dining room as a fourth priority, especially if it’s visible from the main living areas. Otherwise, keep secondary spaces clean and neutral, but save your staging dollars for where they’ll truly move the needle on your sale price.

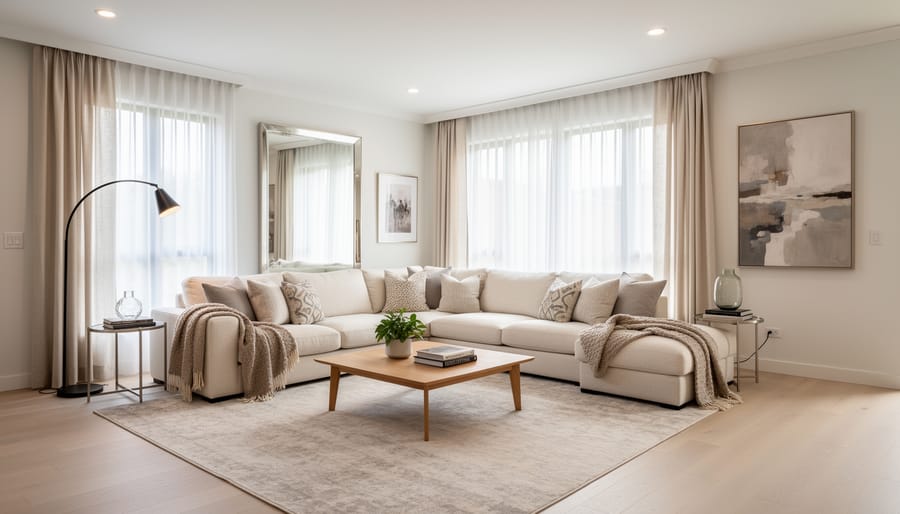
Well-staged modern living room with neutral furniture and natural lighting
Strategic staging of high-impact rooms like the living room creates maximum appeal without requiring a full-home staging budget.

Shop Your Own Home

Before spending a dime on staging, take a fresh look at what you already own. You’d be surprised how effectively you can transform your space by simply shopping your own home and reimagining your existing pieces.

Start by walking through each room with a critical eye, as if you’re seeing it for the first time. Remove personal items like family photos, collectibles, and refrigerator magnets to help buyers envision themselves in the space. Pack away about one-third of your belongings to make rooms feel larger and less cluttered.

Next, identify your best furniture pieces and decor items. That beautiful mirror hanging in your bedroom might make a bigger impact in your entryway. The cozy throw pillows from your guest room could be just what your living room sofa needs to look inviting. Don’t be afraid to pull items from multiple rooms to create one perfectly styled space.

Rearrange furniture to maximize flow and highlight your home’s best features. Float furniture away from walls to create conversation areas, and remove oversized pieces that make rooms feel cramped. Sometimes simply angling a chair differently or repositioning a coffee table can completely change a room’s energy.

Clear off countertops, nightstands, and coffee tables, leaving only one or two carefully chosen decorative items. Group similar decor pieces in odd numbers for visual appeal. Finally, give everything a thorough cleaning. Fresh, clean spaces always show better, and it costs you nothing but time and elbow grease.

Budget-Friendly Staging Rentals and Resources

You don’t need to break the bank to make your home look magazine-ready. Several budget-friendly options can help you stage beautifully without the premium price tag.

Start by exploring affordable furniture rental companies like Fernish, CORT Clearance Centers, or local rental businesses that offer significant discounts on gently used pieces. Many rental companies have recently lowered their rates due to increased competition, with some offering monthly packages starting around $500 for essential pieces. You can often negotiate better rates for longer rental periods or multi-room packages.

Online marketplaces are goldmines for temporary staging needs. Facebook Marketplace and Craigslist frequently feature quality furniture from people moving or redecorating. Since you only need these pieces temporarily, you can purchase items and resell them after your home sells, essentially creating your own rental arrangement. This approach works particularly well for accent pieces like mirrors, lamps, and decorative accessories.

Don’t overlook the power of borrowing. Reach out to friends and family members who might lend furniture pieces for a few weeks. Many people have extra items sitting in storage that they’d be happy to share. Your real estate agent might also have connections with other agents or stagers who swap inventory.

Consider hybrid staging, where you rent only key pieces for high-impact rooms like the living room while using your existing furniture in bedrooms. This strategic approach can cut your staging costs by 50 percent or more while still creating that wow factor buyers are looking for.

The Five-Dollar Fixes That Make a Thousand-Dollar Difference

You don’t need to break the bank to make your home look like a million bucks. Some of the most impactful staging improvements cost less than your weekly grocery run, yet they can significantly influence how buyers perceive your property’s value.

Start with fresh flowers or high-quality faux arrangements. A $15 bouquet placed on the kitchen counter or dining table instantly adds life and color to your space. Buyers subconsciously associate fresh flowers with care and attention to detail. If you’re staging for multiple showings, invest in realistic artificial arrangements that maintain their appeal throughout your listing period.

Neutral throw pillows are staging gold. For $30 to $50, you can purchase a set that transforms dated furniture into contemporary showpieces. Stick with whites, grays, and soft tans that appeal to the broadest audience. This simple swap helps buyers envision their own style in the space while making your rooms feel current and well-maintained.

Cabinet and drawer hardware updates deliver remarkable impact for minimal investment. Swapping outdated brass knobs for modern brushed nickel or matte black pulls costs roughly $2 to $5 per piece. For an average kitchen, you’re looking at about $75 to $150 total, but the transformation makes cabinets appear upgraded and cared for.

Strategic lighting can completely change a room’s ambiance. Replace dim bulbs with bright, daylight-spectrum LEDs for under $30. Add an inexpensive table lamp to dark corners, or install $20 dimmer switches in key areas like the dining room to create atmosphere during showings.

Perhaps the most powerful five-dollar fix is actually free: decluttering. Remove personal photographs, excess furniture, and unnecessary items from countertops and shelves. This costs nothing but time, yet it makes rooms appear larger, cleaner, and more move-in ready. Buyers need to imagine their belongings in your space, not navigate around yours.

These budget-friendly touches work together to create a polished, cohesive presentation that helps buyers justify paying top dollar for your home. The secret isn’t spending more, it’s spending strategically on changes that catch the eye and appeal to emotions.

Hands placing fresh white flowers in vase on styled console table
Simple touches like fresh flowers and thoughtfully arranged accessories create an expensive look for minimal investment.

When to Spend and When to Save

Not every staging element delivers the same return on investment, and knowing where to allocate your budget can mean the difference between overspending and selling smart.

Start by considering your property type and price point. If you’re selling a starter home or condo, buyers typically expect move-in ready condition but not luxury finishes. Focus your budget on cleanliness, fresh paint, and decluttering rather than high-end furniture rentals. However, if you’re marketing a luxury property, professional staging with quality pieces becomes essential since buyers in this segment have higher expectations and are comparing your home to other well-presented listings.

Market conditions should guide your decisions too. In a hot seller’s market where homes fly off the market in days, you might skip full staging and invest only in key rooms like the living room and primary bedroom. In a slower market with more competition, comprehensive staging helps your home stand out and potentially sell faster, making the investment more worthwhile.

Here’s where to spend: Always prioritize curb appeal improvements like landscaping touch-ups and a clean entryway since first impressions matter tremendously. The living room, kitchen, and primary bedroom deserve attention because these spaces influence buying decisions most. Deep cleaning and fresh neutral paint offer incredible value for relatively low cost.

Here’s where you can save: Skip staging rarely-used spaces like formal dining rooms if your budget is tight. You can often use your own furniture with strategic rearrangement rather than renting everything. Guest bedrooms can remain empty or minimally furnished. Avoid trendy decor items that date quickly and focus instead on timeless, neutral pieces.

Consider your home’s condition as well. If your property needs repairs or updates, address those first before investing in staging. A beautifully staged home with obvious maintenance issues won’t fool savvy buyers. Think of repairs as your foundation and staging as the finishing touch that maximizes your home’s appeal once everything else is in order.

Real Staging Budgets: What Homeowners Actually Spend

Let’s look at what real homeowners are spending on staging across different property types, so you can set realistic expectations for your own budget.

For starter homes and condos (under 1,500 square feet), most homeowners invest between $1,500 and $3,000 for partial staging. This typically covers the living room, primary bedroom, and dining area with rental furniture for 60-90 days. Add another $500-800 for professional decluttering and deep cleaning before staging begins.

Mid-range homes (1,500-2,500 square feet) generally see staging costs between $3,000 and $6,000. At this price point, you’re looking at staging four to five key rooms with quality furniture rentals, accessories, and artwork. Many homeowners in this category spend an additional $1,000-1,500 on minor repairs and fresh paint to maximize the staging impact.

Luxury properties (2,500+ square feet) command higher budgets, typically ranging from $6,000 to $15,000 or more. These projects often include staging six to eight rooms, high-end furniture pieces, designer accessories, and sometimes outdoor spaces. The rental period might extend to 120 days or longer, accounting for the typically extended selling timeline of premium properties.

Here’s a transparent breakdown for a typical 2,000 square foot home: consultation fee ($200-500), furniture rental for three months ($2,500-3,500), accessories and artwork ($400-600), professional installation ($300-500), and monthly rental extensions if needed ($800-1,200 per month).

Remember, these investments often return dividends through faster sales and higher offers. Most real estate professionals report that staged homes sell 73% faster than unstaged ones, making the upfront cost well worth considering in your selling strategy.

Overhead view of budgeting materials including calculator and house keys on counter
Creating a realistic staging budget helps homeowners make informed decisions about where to invest their dollars for maximum return.

Here’s the reality: effective home staging doesn’t require a fortune, just smart planning and strategic choices. Whether you invest $500 in a DIY refresh or $5,000 in professional staging, the potential return on investment speaks for itself. Staged homes consistently sell faster and for higher prices than their unstaged counterparts, often recouping staging costs many times over.

The key is focusing your budget where it matters most. Prioritize high-impact areas like your entryway, living room, and kitchen. Tackle decluttering and deep cleaning first since these cost-effective steps deliver impressive results. Then layer in strategic updates based on what your specific property needs and what your budget allows.

Remember, staging is an investment in your home’s sale price, not just an expense. Even modest improvements can shift buyer perception and generate competitive offers. The most successful sellers are those who view staging as a crucial part of their selling strategy rather than an optional luxury.

Ready to create a staging plan that fits your budget and maximizes your home’s potential? I’m here to provide personalized guidance tailored to your specific situation and goals. Let’s connect and discuss how to make your home stand out in today’s market.