
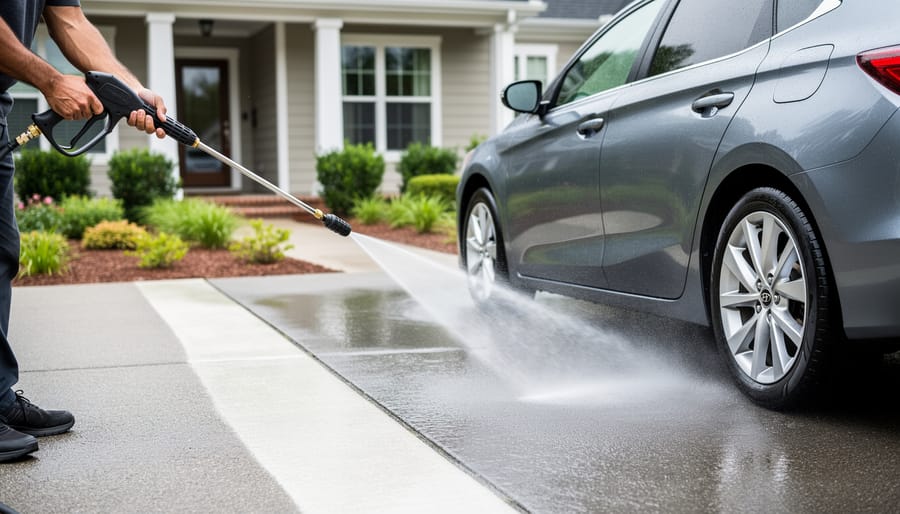
How to Pressure Wash Your Driveway and Car Safely with One Machine
Yes, you can safely pressure wash both your driveway and car with one machine. The key lies in adjusting the pressure settings and using the right nozzle for each surface. Most modern pressure washers operate between 1,200 and 3,000 PSI, and while concrete driveways can handle the full force of 3,000 PSI, your car’s paint requires a gentler touch at 1,200 to 1,900 PSI max.
The concern about damaging your vehicle is valid. High pressure that efficiently strips years of oil stains from concrete will strip clear coat and paint from your car just as quickly. But here’s the good news: switching between tasks takes less than two minutes and requires only a nozzle change and pressure adjustment. You don’t need separate equipment cluttering your garage, and you won’t sacrifice results on either surface.
This guide walks you through the complete process for both applications, with specific pressure settings, nozzle selections, and technique differences that protect your car while still delivering professional-level cleaning power. Think of it as getting two specialized tools in one, similar to how you might save on staging costs by repurposing what you already own.
Whether you’re preparing your property for sale or simply maintaining curb appeal, mastering these techniques means cleaner surfaces without the expense of multiple machines or professional services.
Choosing the Right Pressure Washer for Both Tasks
The secret to safely pressure washing both your driveway and car lies in choosing a machine with enough power for concrete but precise control for painted surfaces. You need a pressure washer that bridges the gap between gentle automotive cleaning and heavy-duty driveway restoration.
PSI (pounds per square inch) measures the force of water hitting a surface, while GPM (gallons per minute) determines how much water flows through the machine. Think of PSI as the punch and GPM as the rinse power. For driveways, you’ll want 2500-3000 PSI to blast away ground-in dirt and tire marks. Cars require a much gentler touch at 1200-1900 PSI to avoid stripping paint or damaging trim.
A dual-purpose machine typically operates in the 2000-3000 PSI range with adjustable pressure settings. This sweet spot gives you enough power for concrete while allowing you to dial down for automotive use. Look for models with variable pressure controls, not just different nozzles. A quality car pressure washer setup includes multiple spray tips that work alongside pressure adjustment to give you complete control.
Essential features include a detergent tank for soap application, quick-connect nozzle system for fast tip changes, and sufficient GPM (1.5-2.5) to rinse effectively. Electric models work well for most homeowners, offering quieter operation and easier maintenance than gas-powered units. The initial investment in a versatile machine pays off when you consider buying separate equipment for each task.
Pay attention to the hose length too. You’ll need at least 25 feet to reach around your car and across your driveway without constantly moving the unit. A longer hose reduces the hassle of repositioning and helps you maintain consistent pressure throughout each cleaning session.
Essential Tools and Materials You’ll Need
Beyond the pressure washer itself, you’ll need a focused set of tools and materials to safely tackle both your driveway and car. Having the right accessories on hand prevents damage, saves time, and lets you switch between surfaces confidently. Here’s everything you should gather before you start:
- Multiple nozzle tips: A 40-degree (white) nozzle for gentle car washing, a 25-degree (green) for slightly more pressure on car wheels, and a 15-degree (yellow) for concrete driveways
- Extension wand: Helps you reach car roofs and large driveway areas without awkward positioning or strain
- Dual-purpose detergent: pH-neutral soap formulated for both automotive finishes and concrete surfaces, or separate cleaners if you prefer specialized formulas
- Pre-treatment brush: Stiff-bristled brush for scrubbing stubborn driveway stains and a softer brush for car wheels and grilles
- Buckets: One for mixing pre-treatment solutions and another for clean rinse water
- Safety glasses: Protect your eyes from debris kicked up by high-pressure spray
- Closed-toe shoes: Non-slip footwear prevents injuries from pressure rebound and wet surfaces
- Microfiber cloths: For drying your car and wiping down trim after washing
The nozzle tips are your most critical investment. That 40-degree tip spreads water over a wider area with gentler pressure, perfect for car paint that scratches easily. The 15-degree creates a concentrated stream that blasts away oil stains and grime embedded in concrete pores. Switching between them takes seconds but makes the difference between a showroom finish and costly paint damage.
Quality cleaning supplies also protect your investment. Harsh degreasers meant for driveways will strip wax from your car’s finish, while car soap won’t cut through concrete stains. Using the correct detergent for each surface ensures effective cleaning without unnecessary risk to either your vehicle or your property.
Critical Safety Warnings Before You Start
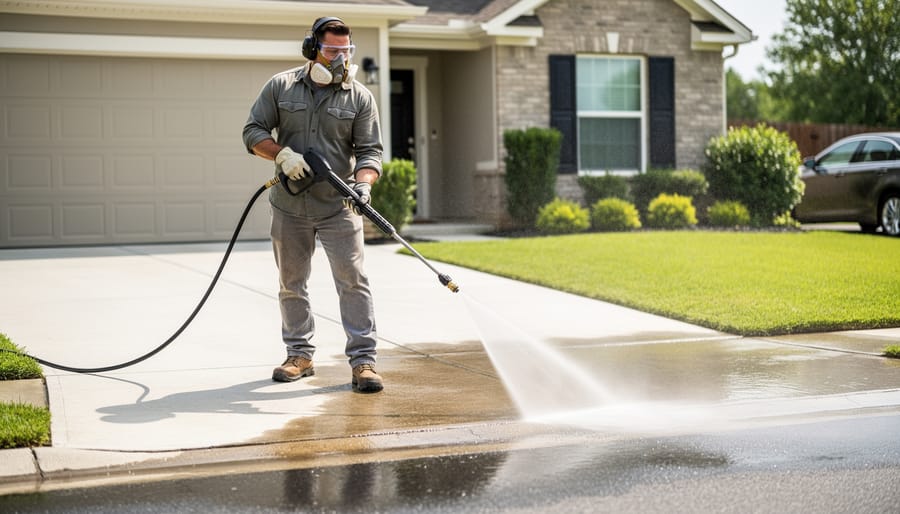
Before you pick up that pressure washer, understand that the same force capable of stripping grime from concrete can destroy your car’s finish in seconds. The difference between effective cleaning and costly damage comes down to knowing your limits and respecting the tool’s power.
The wrong nozzle or pressure setting will strip paint from your vehicle faster than you can react. A zero-degree or even 15-degree nozzle that works perfectly on your driveway can cut through clear coat like a knife, leaving permanent streaks and exposing bare metal. Always switch to a 25-degree or 40-degree nozzle before approaching your car, and reduce your PSI to below 1900.
Distance matters as much as pressure. Keep the nozzle 12 to 18 inches from your car’s surface, which is the safe distance for cars that balances cleaning power with protection. For your driveway, you can work closer at 6 to 12 inches, but moving too close even on concrete can etch the surface.
High-pressure water causes serious injuries. The spray can inject water, chemicals, or debris under your skin, puncture flesh, or cause severe bruising. Never point at people pets, or yourself, even as a joke. Keep children and animals away from your work area entirely.
Wear closed-toe shoes and safety glasses without exception. Water ricocheting off hard surfaces carries grit that can damage eyes, and the spray force can knock you off balance on wet pavement. Avoid sandals, shorts, or any exposed skin near the cleaning zone.
Test first, regret never. Before washing either surface at full strength, spray an inconspicuous spot at your planned pressure and distance. Wait a moment and inspect for damage. This ten-second test can save you from ruining an entire paint job or discovering your driveway sealer can’t handle the pressure.
How to Pressure Wash Your Driveway
Preparing the Driveway Surface
Clear the driveway completely before starting. Move all vehicles, bikes, toys, and outdoor furniture to give yourself unobstructed access to the entire surface. Walk the area and pick up any large rocks, sticks, or debris that could become projectiles under high pressure.
Sweep the driveway thoroughly with a push broom, working from the edges toward the center. This removes loose dirt, leaves, and grit that would otherwise just get blown around by the pressure washer. Pay attention to corners and cracks where debris accumulates.
Oil stains need special attention. Apply a concrete degreaser directly to any oil spots and let it sit for 10-15 minutes before you start washing. For stubborn stains, scrub with a stiff brush to help break down the oil. This pre-treatment makes a noticeable difference in final results.
Protect nearby plants by thoroughly wetting them with a garden hose. The water creates a barrier that helps dilute any cleaning chemicals that might splash onto foliage. Cover delicate plants with plastic sheeting if they’re very close to the washing area.
Attach your 15-degree nozzle or turbo nozzle to the pressure washer wand. Fill the detergent tank if you’re using concrete cleaner. You’re now ready to start washing.
Washing Technique and Pattern
Begin with your pressure washer set to a lower PSI than you think necessary, around 2000 PSI for concrete, and test a small area first. Hold the nozzle 8-12 inches from the surface and watch how quickly dirt lifts. If it’s removing grime effectively, you’ve found your sweet spot. Too close or too powerful, and you risk etching the concrete.
Work methodically across the driveway in 3-4 foot sections, using steady side-to-side sweeping motions. Overlap each pass by about 50% to avoid leaving clean and dirty stripes. The key is keeping the nozzle moving constantly, pausing even briefly in one spot can gouge the surface or create lighter patches that stand out when dry.
For oil stains, rust marks, or ground-in dirt that resists your initial pass, move the nozzle 2-3 inches closer and slow your sweep slightly. Stubborn spots may need a second treatment with a concrete-specific degreaser applied before washing. Let it sit for 5-10 minutes, then pressure wash again.
Always spray at a slight angle rather than straight down. This directs dirty water away from you and prevents it from splashing back onto already-clean areas. Move backward as you clean so you’re not walking on wet sections you’ve just finished.
Rinsing and Final Steps
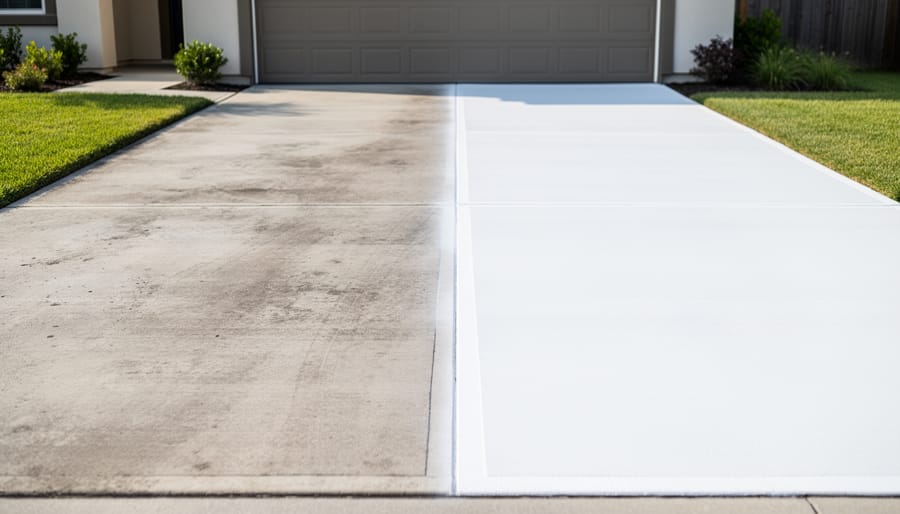
Once you’ve worked through all sections of the driveway, switch to clean water mode and perform a final rinse. Work in the same systematic pattern you used for washing, ensuring you remove all soap residue and loosened dirt. Pay particular attention to drainage areas where detergent tends to collect.
Walk the entire driveway while it’s still wet to spot any areas you missed. Stubborn stains or streaky sections are easier to see when damp. If you find problem spots, address them immediately while your equipment is still set up rather than discovering them after everything’s dried.
Allow at least 24 hours of dry weather before foot or vehicle traffic. Concrete needs time to fully dry before you can accurately assess whether sealant is necessary. Most driveways benefit from sealer application every two to three years, but wait 48 hours after pressure washing before applying any protective coating. The surface must be completely dry, or the sealant won’t bond properly and you’ll waste time and money on a treatment that fails prematurely.
How to Pressure Wash Your Car Without Damage
Adjusting Your Machine for Automotive Use
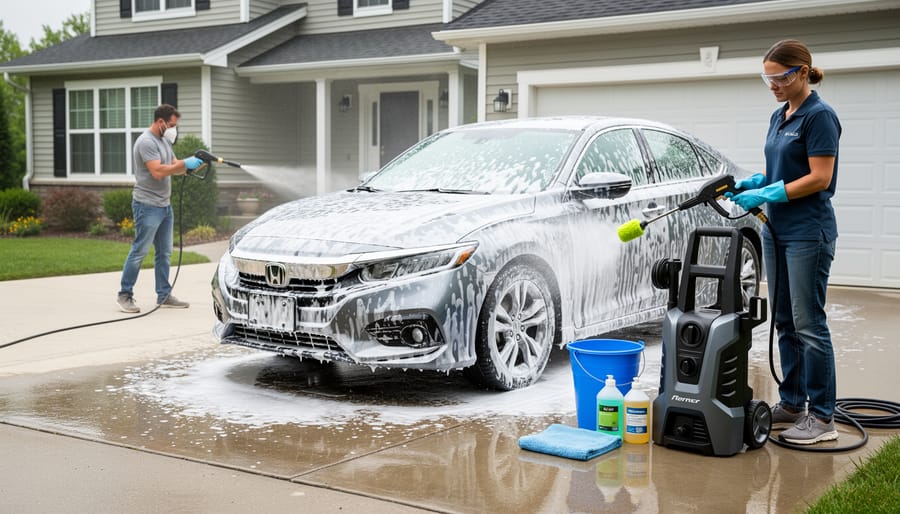
Before moving your pressure washer from driveway duty to car washing, you need to make three critical adjustments that protect your vehicle’s finish.
First, dial down the PSI to between 1200 and 1900. Most pressure washers rated at 2000-3000 PSI have adjustment dials or unloader valves that let you reduce output pressure. Check your machine’s manual for the specific method. This lower pressure range removes dirt effectively without stripping wax, peeling clear coat, or forcing water past door seals.
Next, swap your 15-degree nozzle for either a 25-degree or 40-degree tip. These wider spray patterns distribute pressure over a larger area, reducing the force hitting any single point. The 40-degree nozzle works best for initial washing and delicate areas like side mirrors and trim. Save the 25-degree tip for dirtier spots like wheel wells, but maintain your distance.
Finally, fill your detergent tank with automotive-specific soap rather than the heavy-duty cleaner you used on concrete. Car wash solutions are pH-balanced to protect paint and won’t leave residue that etches into your finish. They also produce better lubrication, letting dirt slide off rather than scratching as you spray.
These three changes take under two minutes but make the difference between a clean car and an expensive paint repair.
Proper Car Washing Sequence
Start at the roof and work your way down in overlapping horizontal passes. This top-to-bottom approach prevents dirty water from dripping onto already-cleaned sections. Keep your nozzle 12 to 18 inches from the paint surface, using smooth, consistent sweeping motions rather than lingering in one spot.
Once you’ve completed the initial rinse, apply car soap using your pressure washer’s detergent setting or soap nozzle. The low pressure setting distributes soap evenly without forcing it into seams or under trim. Cover the entire vehicle systematically, again working from top to bottom. Let the soap sit for two to three minutes to break down dirt and grime, but don’t allow it to dry on the surface.
When you’re ready to rinse, return to the top and wash away all soap residue. Pay special attention to crevices around door handles, mirrors, and trim pieces where soap tends to collect. Avoid aiming the spray directly at badges, emblems, or decals since concentrated pressure can lift edges or cause peeling.
Save the wheels and wheel wells for last since they’re the dirtiest parts. This prevents you from spraying road grime back onto your freshly cleaned paint. For windows and mirrors, maintain the same 12 to 18 inch distance and use gentle, angled passes to prevent water from forcing its way past weatherstripping.
Rinsing and Protecting Your Finish
After washing, switch back to the wider-angle nozzle and rinse your car thoroughly from roof to bumper, ensuring all soap cascades downward. Pay special attention to crevices around door handles, side mirrors, and trim pieces where suds tend to hide. Move methodically around the vehicle, maintaining your 12-18 inch distance, and check for streaks or film that signal leftover detergent.
For best results, dry your car immediately using microfiber towels or a dedicated automotive air blower to prevent water spots, especially in hard water areas. Start at the top and work down, blotting rather than dragging the towel to avoid swirl marks. If you notice mineral deposits forming despite prompt drying, a quick spray with detail solution will restore clarity.
Consider applying a spray wax or ceramic sealant while the surface is still slightly damp for enhanced protection and easier future cleaning. A well-maintained vehicle finish complements other curb appeal strategies that keep your entire property looking sharp throughout the year.
Verifying Your Results and Troubleshooting
Once you finish washing, walk your driveway slowly and look for streaks, missed patches, or stubborn oil stains that need another pass. Successful driveway cleaning shows uniform color across the concrete with no visible dirt lines or dark spots. If you notice uneven areas, mark them mentally and go over those sections again with the same sweeping motion you used initially.
For your car, step back and check the paint from multiple angles under good lighting. Look for water beading evenly across panels, which indicates clean surfaces free of soap residue. Run your hand gently over the paint, it should feel smooth, not gritty. Inspect around emblems, door handles, and trim pieces where soap tends to hide. White streaks or hazy patches mean you need to rinse those areas again with plain water.
If dirt remains on either surface, don’t immediately crank up the pressure. Try a second pass with the same settings first, or apply cleaner and let it dwell longer before rinsing. Stubborn driveway stains might need a dedicated degreaser and scrub brush rather than just more PSI.
Clean driveways and vehicles boost curb appeal significantly, which matters whether you’re evaluating repairs vs staging decisions or simply maintaining your property. When both look fresh, you’ve confirmed your pressure washer handled the dual task successfully.
Common Questions About Dual-Purpose Pressure Washing
How often should I pressure wash my driveway versus my car?
Your driveway typically needs pressure washing once or twice a year depending on weather and traffic, while your car benefits from washing every two weeks to maintain its finish and remove contaminants before they bond to the paint.
Do I need to flush the system between washing my driveway and car?
Yes, run clean water through the pressure washer for 30-60 seconds after driveway cleaning to remove any debris or harsh chemicals before switching to your vehicle. This simple step prevents grit from scratching your car’s paint.
Can I use the same detergent for both surfaces?
No, use heavy-duty degreasers or concrete cleaners for your driveway and pH-balanced automotive soap for your car. The harsh chemicals that lift oil stains from concrete can strip wax and damage your vehicle’s clear coat.
Is it safe to pressure wash in winter or cold weather?
Avoid pressure washing when temperatures drop below 40°F, as water can freeze on surfaces and in your machine’s pump, causing damage. Schedule your maintenance for spring through fall in most climates.
When should I hire a professional instead of doing it myself?
Consider calling a pro if you notice deep concrete cracks needing repair first, have a delicate or vintage vehicle with fragile paint, or feel uncomfortable operating the equipment safely after reading the manual.
These questions reflect what most homeowners wonder when they first consider using one pressure washer for multiple purposes. The learning curve isn’t steep, but starting with realistic expectations helps you avoid mistakes.
One consideration many people overlook is timing maintenance around life events. If you plan to sell your home a freshly cleaned driveway and sparkling vehicles in listing photos make a noticeable difference in curb appeal. Schedule both tasks a day or two before professional photography for maximum impact.
Your pressure washer will last longer when you follow the manufacturer’s maintenance schedule, store it properly between uses, and avoid pushing it beyond its rated capacity. Taking care of your equipment means it continues handling both tasks effectively for years.
You don’t need two machines cluttering your garage. A single quality pressure washer handles both your driveway and car beautifully when you respect the fundamentals: dial down the PSI for automotive surfaces, swap to wider-angle nozzles, and keep your distance. The investment pays off quickly compared to buying separate equipment or paying for professional washes throughout the year.
Beyond saving money, there’s real satisfaction in maintaining your property yourself. A clean driveway and sparkling vehicle create an immediate positive impression, whether you’re enjoying your home or preparing it for potential buyers. That curb appeal matters more than most homeowners realize.
Start conservative with your pressure settings and work your way up as you gain confidence. Test inconspicuous spots first, master the proper distance, and you’ll develop an efficient routine that keeps both surfaces looking their best. The machine doesn’t care what it’s cleaning, your technique and preparation make all the difference. With the right approach, you’ve got a versatile tool that tackles two of your biggest outdoor cleaning challenges without compromising either one.
Leave a Reply