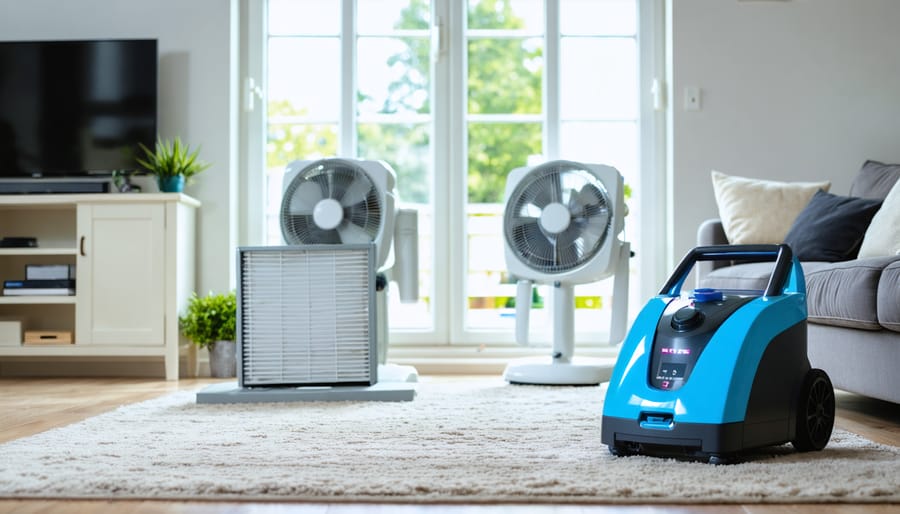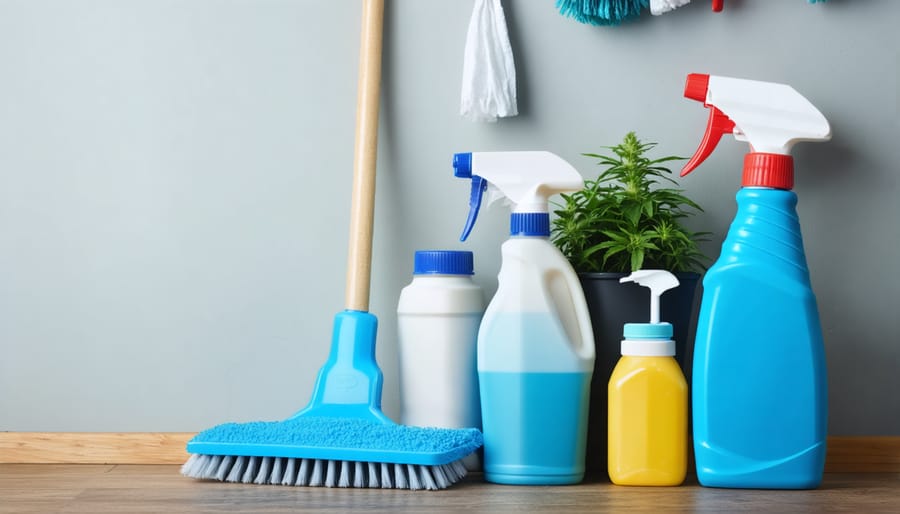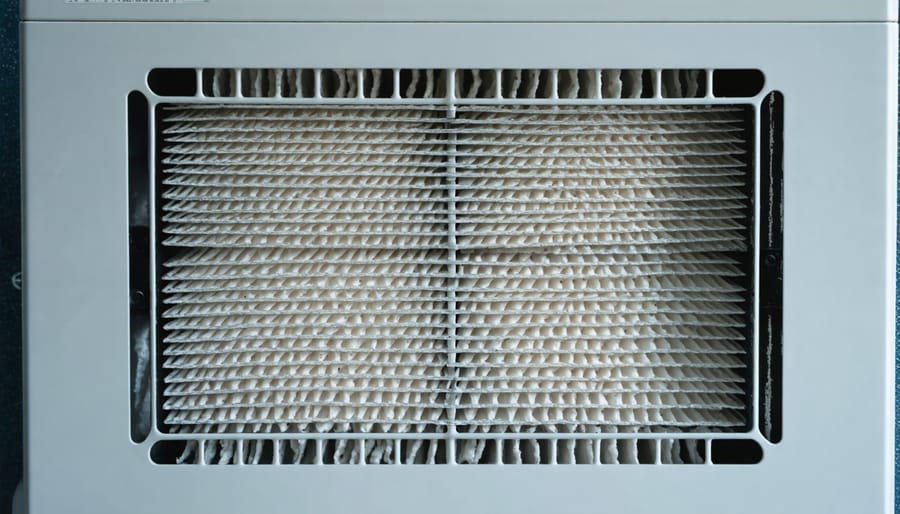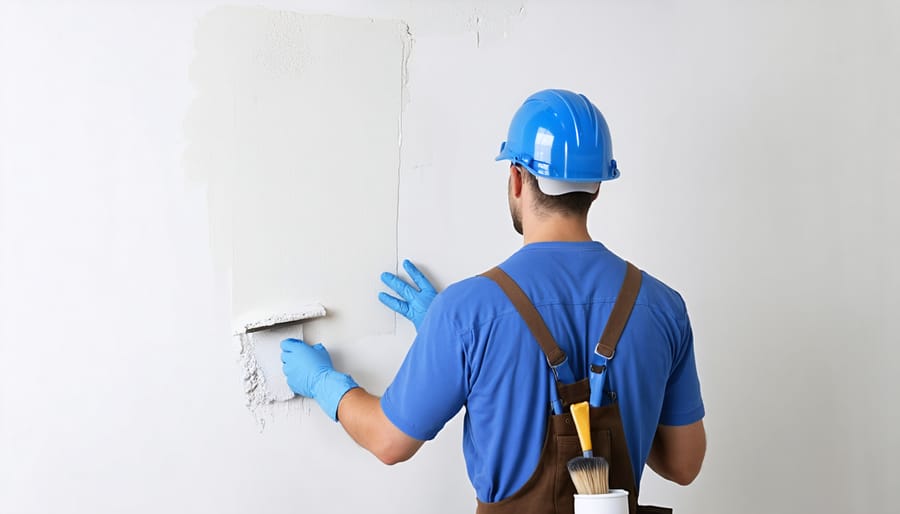
Open, sunlit living room with box fans venting through windows, a carpet steam cleaner on the rug, and a new HVAC filter by a return vent; tidy furnishings softly blurred in the background.

Remove Delta-9 THC Smell Before Selling Your Home (It’s Easier Than You Think)

Neutralize Delta-9 THC products odors systematically by opening all windows and running fans for 72 hours before listing—this creates cross-ventilation that removes trapped cannabis molecules from fabrics and surfaces. Deep clean every textile in your home, including curtains, upholstery, carpets, and bedding, using enzymatic cleaners specifically designed to break down THC compounds rather than simply masking scents.

Replace HVAC filters immediately and schedule professional duct cleaning, as cannabis particles circulate through your ventilation system and redeposit throughout your home. Wipe down all hard surfaces—walls, ceilings, light fixtures, and baseboards—with a vinegar solution or TSP cleaner, paying special attention to rooms where you consumed products most frequently.

Steam clean or replace carpeting in heavy-use areas, since porous flooring materials absorb and retain odors that standard vacuuming can’t eliminate. Consider repainting walls with odor-blocking primer like Kilz or Zinsser, which seals residual smells beneath fresh paint rather than allowing them to permeate through.

Hire a professional odor remediation service if DIY methods prove insufficient—these specialists use ozone generators, thermal fogging, or hydroxyl machines that neutralize odors at the molecular level. Taking these steps protects your home’s market value, as buyers’ first impressions form within seconds of entering, and lingering cannabis odors can trigger lower offers or lost sales regardless of legality.

What Is Delta-9 THC and Why Does It Leave an Odor?

Delta-9 THC is the primary psychoactive compound found in cannabis—the component responsible for the “high” that users experience. While cannabis laws vary by location, Delta-9 THC products derived from hemp (containing less than 0.3% THC by dry weight) are legal in many areas under federal law, and several states have legalized recreational marijuana use. As social acceptance and legal access have grown, more homeowners are using these products in their homes without realizing the lasting impact on indoor air quality and surfaces.

The distinctive cannabis odor doesn’t come from Delta-9 THC itself, but rather from aromatic compounds called terpenes. These naturally occurring oils give cannabis its recognizable scent and are released when the plant material is heated through smoking or vaporizing. Common terpenes like myrcene, limonene, and pinene create that characteristic earthy, skunky, or citrusy smell that lingers long after use.

Here’s the challenge for homeowners: these odor molecules are incredibly persistent. When you smoke or vaporize cannabis indoors, microscopic particles and vapor settle onto every surface in your home. Porous materials are particularly problematic—fabrics in furniture and curtains, carpet fibers, drywall, wood, and even paint absorb these compounds like a sponge. The odor molecules penetrate deep into these materials, making surface-level cleaning ineffective.

Think of it like cooking fish in your kitchen; the smell doesn’t just disappear when you’re done. Cannabis odors work similarly but can be even more stubborn because terpenes are oily substances that bond to surfaces. This is why potential buyers often notice the smell immediately upon entering a home, even if you’ve grown accustomed to it. Understanding this science is your first step toward effective odor removal and protecting your home’s market value.

Why Delta-9 THC Odor Matters When Selling Your Home

Bright, clean living room with white walls and neutral furniture ready for home showing
A clean, odor-free home interior creates positive first impressions during showings and maximizes property appeal to potential buyers.

First Impressions Count

You never get a second chance to make a first impression, and that’s especially true in real estate. When potential buyers walk through your door for the first time, they’re forming opinions within seconds—and unfortunately, their noses are working just as hard as their eyes. Even the faintest hint of Delta-9 THC odor can immediately shift a buyer’s focus away from your beautiful kitchen renovation or stunning hardwood floors.

Here’s the reality: buyers are emotionally investing in a vision of their future home during that first showing. Any lingering odor, no matter how legal or personally acceptable to you, disrupts that vision. They start wondering about what else might be hiding in the walls or carpets. Instead of imagining family dinners in your dining room, they’re calculating remediation costs and questioning the property’s upkeep.

Real estate professionals consistently report that odor issues—whether from pets, smoke, or cannabis—rank among the top deal-breakers for buyers. The good news? Unlike structural problems, odors are completely fixable with the right approach, allowing your home’s genuine selling points to shine through.

Impact on Home Value

The presence of cannabis odors in your home can significantly impact your bottom line when it’s time to sell. Real estate experts report that homes with detectable Delta-9 THC odors typically see price reductions ranging from 5% to 15% of the property’s market value. On a $400,000 home, that could mean losing $20,000 to $60,000 simply due to lingering smells.

Beyond initial pricing concerns, cannabis odors create substantial negotiation challenges. Buyers who detect these smells during showings often submit lower offers or request concessions for professional cleaning and remediation. Some buyers may walk away entirely, particularly those with sensitivities, families with children, or investors concerned about rental prospects.

The financial impact extends to your property’s time on market as well. Homes with noticeable odors tend to sit longer, which can force additional price reductions and raise red flags for potential buyers wondering why the property hasn’t sold. Mortgage lenders may also require odor remediation before approving loans, potentially derailing deals at the last minute. Taking proactive steps to eliminate Delta-9 THC odors before listing protects your investment and positions your home competitively in the market.

Assessing the Extent of Delta-9 THC Odor in Your Home

Get a Fresh Nose

Here’s an important truth about odor removal: you’re probably not the best judge of whether your home still smells like cannabis. When you’re exposed to the same scent day after day, your brain tunes it out—a phenomenon called “olfactory fatigue” or nose-blindness. You might think your home smells fresh, but potential buyers walking in for the first time will notice immediately.

This is where getting a fresh perspective becomes invaluable. Invite a trusted friend or family member who doesn’t visit your home regularly to do an honest smell test. Ask them to be completely candid—this isn’t the time for politeness. Better yet, reach out to your real estate agent before listing. Experienced agents have toured hundreds of homes and can provide an objective assessment of any lingering odors.

When asking for feedback, have your helper check high-risk areas like bedrooms, living rooms, and anywhere with upholstered furniture or curtains. Request they note even subtle hints of cannabis smell, as these can trigger concerns for buyers. Consider doing multiple checks throughout your odor-removal process to track your progress. Remember, an honest outside opinion now can save you from awkward showings and lowball offers later.

Common Problem Areas

Delta-9 THC odors don’t distribute evenly throughout your home—they tend to settle and concentrate in specific areas where usage occurs most frequently and where materials readily absorb smells. Understanding these hot spots will help you focus your removal efforts where they matter most.

**Living rooms and entertainment spaces** typically see the heaviest concentration of odors, especially if this is where you’ve primarily used Delta-9 products. Soft furnishings like couches, throw pillows, and upholstered chairs act like sponge magnets for odors, absorbing and holding onto particles over time.

**Basements** present unique challenges due to poor ventilation and often porous concrete surfaces. The typically damp environment can actually trap and intensify odors, making them particularly noticeable to prospective buyers during showings.

**Carpets and area rugs** deserve special attention—their fibers trap odor particles deep within, and standard vacuuming simply won’t cut it. Similarly, **curtains and drapes** hang in rooms day after day, absorbing everything in the air around them.

Don’t overlook your **HVAC system**, which can circulate odors throughout your entire home. If you’ve used Delta-9 products while heating or cooling systems were running, those particles have likely been distributed through ductwork and settled on filters, making every room potentially affected.

Bedrooms where usage occurred will also need thorough attention, particularly mattresses, bedding, and closet contents where fabrics can harbor stubborn smells.

Step-by-Step Delta-9 THC Odor Removal Process

Start with Deep Cleaning

Deep cleaning is your foundation for eliminating Delta-9 THC odors from your home. This isn’t your typical weekend tidy-up—you’ll need to tackle every surface where smoke particles and residue have settled over time.

Start by gathering your supplies. You’ll want TSP (trisodium phosphate) cleaner or a vinegar-based solution, microfiber cloths, scrub brushes, and professional cleaning supplies designed for odor removal. Don’t forget protective gloves and proper ventilation while you work.

Begin with your walls and ceilings, as these surfaces absorb the most odor. Mix your cleaning solution according to package directions and work from top to bottom in small sections. Pay special attention to corners, light fixtures, and ceiling fans where residue accumulates. You may notice the water turning yellowish or brown—that’s the buildup you’re removing.

Next, move to hard surfaces like baseboards, door frames, windowsills, and light switches. These often-overlooked areas trap surprising amounts of residue. Scrub thoroughly but gently to avoid damaging finishes.

Don’t forget your floors. Whether you have hardwood, tile, or laminate, mop multiple times with fresh cleaning solution until the water runs clear. For textured surfaces, use a scrub brush to reach into grooves.

Finally, clean all fixtures, cabinet fronts, and hardware. Even doorknobs and drawer pulls can harbor odor-causing residue. This comprehensive approach ensures you’re addressing the problem at its source, not just masking it temporarily.

Person wearing cleaning glove wiping down wall with microfiber cloth
Deep cleaning all wall surfaces is a critical first step in removing embedded Delta-9 THC odors from your home.

Address Soft Surfaces and Fabrics

Soft surfaces like carpets, curtains, and upholstery act like sponges for Delta-9 THC odors, making them your top priority for deep cleaning. These fabrics trap smoke particles and residue in their fibers, so surface-level cleaning simply won’t cut it.

Start with professional steam cleaning for carpets and upholstery. Steam cleaning penetrates deep into fibers, lifting out odor-causing particles that regular vacuuming leaves behind. For best results, hire a reputable cleaning company that uses odor-neutralizing solutions specifically designed for smoke removal—not just masking fragrances. Plan to have carpets cleaned at least twice, allowing them to dry completely between sessions.

Curtains and drapes should be dry-cleaned or, if machine-washable, laundered with an odor-eliminating additive. Don’t forget about smaller fabric items like throw pillows, blankets, and lampshades, which also absorb odors surprisingly well.

Here’s the honest truth: sometimes replacement is more cost-effective than cleaning. If your carpets are older, heavily saturated with odor, or showing wear, new flooring might be your better investment. Potential buyers appreciate fresh, neutral carpeting, and you’ll recoup much of the cost through a higher sale price and faster transaction.

Similarly, if curtains remain smelly after professional cleaning, replacing them with inexpensive, neutral options costs less than repeated cleaning attempts. Think of it as a strategic upgrade that benefits your sale rather than an unnecessary expense—fresh fabrics signal a well-maintained home to buyers.

Clean or Replace Air Filters and HVAC Components

Your HVAC system works hard to keep your home comfortable, but it can also become a storage facility for Delta-9 THC odors. As air circulates through your home, odor particles get trapped in ductwork, settle on filters, and cling to components—continuously redistributing that telltale smell throughout your property.

Start by replacing all air filters immediately. These inexpensive components trap odor particles and should be swapped for fresh, high-quality filters. Don’t just upgrade your main HVAC filter—check bathroom exhaust fans, range hoods, and any other ventilation points in your home.

For a deeper clean, remove vent covers and wipe down the visible portions of your ductwork with a mixture of water and mild detergent. Pay special attention to rooms where Delta-9 products were used most frequently. While you’re at it, vacuum out any dust or debris you can reach—this buildup can harbor odors.

Consider hiring a professional HVAC cleaning service for a thorough duct cleaning, especially if you’ve been a regular user or if odors persist after your initial efforts. These specialists use specialized equipment to access deep within your ductwork, removing accumulated particles that DIY methods can’t reach. While this investment typically costs $300-$500, it’s worth it when you’re preparing for a home sale. Clean ductwork not only eliminates odors but also demonstrates proper home maintenance to potential buyers during inspections.

Hands removing air filter from ceiling HVAC vent for replacement
Replacing HVAC filters and cleaning ventilation systems prevents odor circulation throughout your home during showings.

Repaint Walls and Ceilings

After you’ve thoroughly cleaned and treated all surfaces, repainting walls and ceilings becomes your final defense against lingering Delta-9 THC odors. This step is crucial—don’t skip straight to paint without proper preparation, or you’ll risk odors seeping through and sabotaging your sale.

Start by applying a high-quality odor-sealing primer specifically designed to trap smells. Products like Kilz or Zinsser BIN shellac-based primer create an effective barrier that locks in any remaining odor molecules. Apply at least two coats to walls and ceilings, paying special attention to areas where smoke or vapor may have concentrated. This investment typically costs between $30-50 per gallon but provides essential odor-blocking protection that standard primers simply can’t match.

Once your primer has fully dried, choose paint colors strategically. Fresh, neutral tones like soft grays, warm whites, or gentle beiges appeal to the broadest range of potential buyers and help your home feel clean and move-in ready. These colors also reflect light beautifully, making spaces feel larger and more inviting—exactly what buyers want to see.

Consider using paint with built-in odor-neutralizing technology for an extra layer of protection. While slightly more expensive, these specialized paints can provide added peace of mind during showings.

Remember, proper ventilation during and after painting helps ensure the space smells fresh and paint-free when buyers walk through your door. This final step demonstrates the care you’ve taken in preparing your home for sale.

Paint roller applying white primer to interior wall for odor sealing
Applying odor-sealing primer before repainting traps lingering smells and provides a fresh canvas for neutral wall colors.

Use Odor Neutralizers (Not Just Air Fresheners)

Here’s a crucial distinction many homeowners miss: air fresheners simply mask odors temporarily, while neutralizers actually eliminate them at the molecular level. When selling your home, you need genuine odor removal, not a cover-up that potential buyers will see right through—sometimes literally within minutes of entering your home.

**Activated charcoal** is your first line of defense. Place bowls of activated charcoal throughout affected rooms, especially near soft furnishings. Unlike regular charcoal, activated charcoal has millions of tiny pores that trap odor molecules. Replace every few weeks for best results.

**Baking soda** works similarly and costs even less. Sprinkle generously on carpets, upholstery, and mattresses. Let it sit for at least 24 hours before vacuuming thoroughly. For persistent odors, repeat the process multiple times.

**Enzymatic cleaners** break down organic compounds in smoke residue. Look for products specifically designed for smoke odor removal, and follow instructions carefully for hard and soft surfaces.

**Ozone generators** can be highly effective but require caution. These devices must be used in unoccupied spaces—they’re not safe for people or pets during operation. Consider hiring professionals for ozone treatment, as improper use can damage materials and create health hazards. Ventilate thoroughly afterward.

The key is patience and persistence. Odor neutralization takes time, but it’s worth the investment when you’re protecting your home’s sale value.

Increase Ventilation

The simplest and most cost-effective step is also one of the most powerful: fresh air. Open all windows throughout your home to create cross-ventilation, allowing cannabis odors to escape naturally. Position box fans or oscillating fans in windows to actively push stale air out while drawing fresh air in from the opposite side of your home.

Run your HVAC system’s fan on continuous mode rather than automatic to keep air constantly circulating through your ventilation system. Don’t forget about often-overlooked spaces like closets, bathrooms, and basements—these areas can trap odors and need attention too.

For maximum effectiveness, aim to ventilate your home for at least 24-48 hours before any showings. Schedule this during mild weather when you can comfortably leave windows open for extended periods. Morning ventilation sessions work particularly well when outdoor air is fresh and temperatures are moderate. This natural airing-out process costs nothing and provides an excellent foundation for any additional odor removal methods you’ll implement.

When to Call in Professional Help

Sometimes DIY methods just aren’t enough to completely eliminate strong Delta-9 THC odors, especially if you’ve been using products regularly over several months or years. If you’ve tried deep cleaning, painting, and airing out your home but still notice that distinctive smell, it’s probably time to bring in the professionals.

Professional odor removal services use specialized equipment and techniques that go beyond typical household cleaning. These experts employ ozone generators, hydroxyl generators, and thermal fogging—tools that penetrate porous materials where odor molecules hide. They can also identify problem areas you might have missed, like HVAC systems or subflooring that have absorbed odors over time.

You should definitely consider professional help if you’re dealing with heavy smoke residue on walls and ceilings, persistent odors after multiple DIY attempts, or if you’re working with a tight timeline to list your home. When preparing a home for sale, the investment in professional services often pays for itself through faster sales and better offers.

Expect to pay anywhere from $500 to $3,000 depending on your home’s size and the severity of the odor problem. Most companies offer free consultations where they’ll assess the situation and provide a detailed quote. The process typically takes one to three days, and you’ll usually need to vacate the home during treatment.

Look for restoration companies with experience in smoke and odor removal—they’ll have the right expertise for cannabis-related odors. Check reviews, verify their certifications, and ask about their success rate with similar situations. A reputable company will guarantee their work and may offer follow-up treatments if needed.

Preventing Odor Issues Before Listing

If you’re a Delta-9 THC user who plans to sell your home down the road, taking preventive measures now can save you significant time, money, and stress later. The good news is that a few simple habits can dramatically minimize odor absorption and make your eventual home sale much smoother.

**Consider outdoor consumption whenever possible.** Taking your Delta-9 THC use outside is the single most effective way to prevent indoor odor buildup. Designate a specific outdoor area away from windows and doors to keep smoke and vapor from drifting back inside. This simple shift in routine can make all the difference when it’s time to list.

**Invest in quality ventilation and air purification.** If outdoor consumption isn’t feasible, ensure you’re using Delta-9 products in well-ventilated spaces near open windows with fans running. A high-quality HEPA air purifier with activated carbon filtration can capture odor particles before they settle into your home’s surfaces. Run these purifiers consistently in the rooms where you consume.

**Establish a regular deep-cleaning routine.** Don’t wait until listing day to address odors. Wash curtains, bedding, and upholstery monthly. Wipe down walls, light fixtures, and other hard surfaces regularly. Vacuum carpets and furniture frequently, and consider steam cleaning every few months.

**Keep fresh air circulating.** Open windows regularly, even in winter, to promote air exchange and prevent stale odors from accumulating. This simple habit keeps your home smelling fresh and reduces the likelihood of stubborn odors taking hold.

Final Pre-Sale Checklist for Odor-Free Showings

Before any showing, run through this essential checklist to ensure your home presents at its absolute best. Start by opening all windows at least 2-3 hours before prospective buyers arrive—even in cooler weather, fresh air circulation is crucial for eliminating any lingering traces. Walk through every room with fresh eyes, paying special attention to soft furnishings, closets, and enclosed spaces where odors might hide.

Consider a subtle scenting approach about 30 minutes before showings. Lightly diffuse universally appealing scents like vanilla, citrus, or fresh linen—but avoid overwhelming artificial fragrances that might signal you’re covering something up. Baking cookies or brewing fresh coffee creates an inviting atmosphere without raising red flags.

Here’s where outside perspective becomes invaluable: ask a trusted friend or neighbor who doesn’t visit regularly to do a “smell test” walk-through. You’ve likely become nose-blind to your home’s scent profile, so their honest feedback is gold. If you’ve implemented vape-friendly interior design elements, ensure these areas are particularly well-ventilated.

Finally, do a quick HVAC filter check and run ceiling fans on low to keep air circulating throughout the showing. These small actions demonstrate care and attention to detail that buyers genuinely appreciate.

Removing Delta-9 THC odors from your home is entirely achievable with the right approach and commitment. While it may require some investment of time, effort, and resources, the payoff is significant—a fresh, neutral-smelling home that appeals to the broadest range of potential buyers and maximizes your property’s value.

Remember, buyers make quick judgments during showings, and creating a welcoming atmosphere starts with eliminating any odors that might distract or concern them. Whether you tackle the project yourself or hire professionals, addressing these odors head-on demonstrates your commitment to presenting your home in its best light.

Every home is unique, and your specific situation may require a customized approach. If you’re feeling uncertain about where to start or want expert guidance tailored to your property, we’re here to help. Our team understands the real estate market and can provide personalized advice to ensure your home is market-ready. Reach out today for a consultation, and let’s work together to make your home sale as smooth and successful as possible.

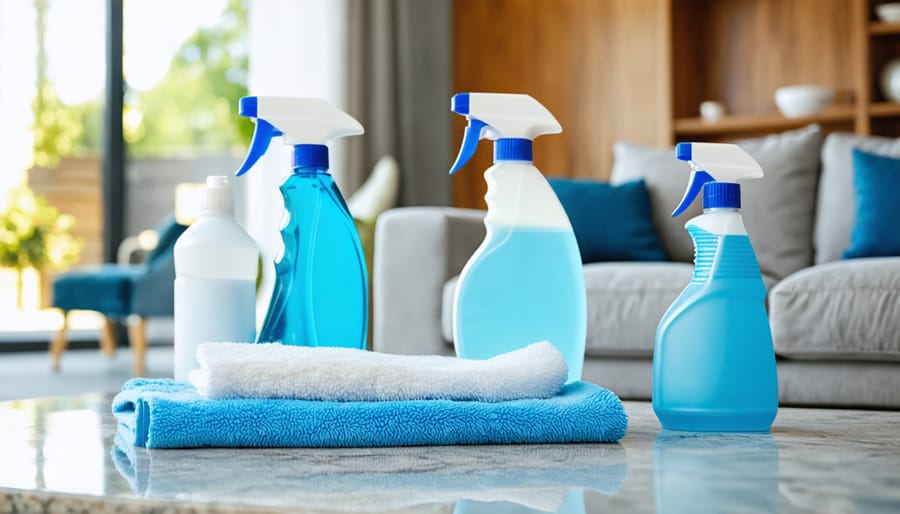
A beautifully staged living room featuring an assortment of professional-grade cleaning supplies, illustrating the impact of effective cleaning on property presentation.

Professional Home Staging Cleaning Supplies That Make Properties Shine

Transform your home staging success with professional-grade cleaning supplies that maximize property appeal when selling your property. Leading suppliers like Mustang Hygiene recommend a core arsenal of commercial-quality microfiber cloths, hospital-grade disinfectants, and streak-free glass cleaners for showcasing homes at their absolute best.

Professional home stagers understand that immaculate presentation directly impacts buyer perception and sale prices. Beyond standard household cleaners, staging-specific supplies include specialized solutions for hardwood floors, stainless steel appliances, and natural stone surfaces that photograph exceptionally well during virtual tours and in-person showings.

Strategic investment in premium cleaning tools – from high-powered vacuum cleaners to eco-friendly degreasers – ensures consistent, showroom-ready results across multiple properties. These commercial-grade products not only deliver superior cleaning power but also reduce preparation time and labor costs, making them essential assets for real estate professionals and home sellers focused on maximum return on investment.

Organized commercial cleaning supplies cart with professional-grade products
Professional-grade cleaning supplies neatly organized on a cleaning cart, including surface cleaners, glass solutions, and floor care products

Essential Commercial-Grade Cleaning Products for Home Staging

Surface Cleaners and Disinfectants

For effective home staging, stock up on high-quality surface cleaners and disinfectants that can tackle various materials safely and effectively. Start with an all-purpose cleaner for general cleaning tasks – look for pH-neutral formulas that won’t damage delicate surfaces. For kitchen and bathroom surfaces, choose a commercial-grade disinfectant that eliminates bacteria while leaving a streak-free finish.

Keep specialized cleaners on hand for specific materials: wood cleaner for hardwood floors and furniture, glass cleaner for windows and mirrors, and stone cleaner for granite or marble countertops. These targeted solutions ensure optimal results without risking damage to expensive surfaces.

Don’t forget about stainless steel appliances – use a dedicated stainless steel cleaner to remove fingerprints and restore shine. For carpet and upholstery spot cleaning, invest in an enzyme-based cleaner that breaks down organic stains and odors.

Always test cleaners on a small, inconspicuous area first, and keep natural alternatives like vinegar and baking soda solutions available for environmentally conscious buyers. Remember to check product labels for proper dilution ratios and safety instructions before use.

Glass and Mirror Cleaning Solutions

For sparkling windows and mirrors that catch natural light and make spaces appear larger, invest in professional-grade glass cleaning solutions. Commercial glass cleaners like Sprayway or Invisible Glass offer superior streak-free results compared to household varieties. Always pair these solutions with high-quality microfiber cloths or lint-free newspapers to prevent streaking and lint residue.

A professional-grade squeegee is essential for larger windows and glass doors. Look for brands like Unger or Ettore, which feature replaceable rubber blades for consistently clean results. For mirrors, avoid ammonia-based products as they can damage protective backings over time.

Keep a supply of fine-mist spray bottles to apply cleaning solutions evenly. For stubborn spots or fingerprints, keep a bottle of concentrated glass cleaner on hand. Don’t forget to clean window tracks and frames – a detail that buyers notice. For high windows or mirrors, invest in an extension pole with appropriate attachments to ensure every surface sparkles from top to bottom.

Floor Care Products

For hardwood floors, invest in a high-quality pH-neutral cleaner that won’t strip the finish, along with a microfiber mop system for streak-free results. Laminate floors require specialized cleaners that won’t leave residue or damage the protective layer – avoid excess water which can cause warping.

When dealing with carpet, a commercial-grade carpet cleaner and stain remover are essential. Look for enzyme-based solutions that break down deep-set stains and eliminate odors. For tile and grout, choose an alkaline cleaner that cuts through built-up grime, paired with a sturdy brush for grout lines.

Natural stone floors need gentle, non-acidic cleaners specifically formulated for marble, granite, or slate. For vinyl and linoleum, opt for pH-neutral cleaners that restore shine without leaving a sticky residue. Remember to always test new products in an inconspicuous area first, and keep a selection of floor-specific cleaning pads and mop heads on hand for different surfaces.

Professional Cleaning Tools and Equipment

Microfiber Cleaning Systems

Microfiber cleaning systems are the cornerstone of professional home staging, offering superior cleaning performance that’s essential when preparing an inherited house for sale or staging any property. These systems typically include color-coded cloths and mops designed for specific surfaces and tasks.

The key components of a professional microfiber system include:
– Ultra-fine dusting cloths for delicate surfaces
– Glass and mirror cloths that leave streak-free finishes
– All-purpose cleaning cloths for general surfaces
– Heavy-duty scrubbing cloths for tough spots
– Microfiber mops with interchangeable heads

What sets microfiber apart is its ability to trap dust, dirt, and bacteria without requiring excessive cleaning solutions. The tiny fibers create a static charge that attracts and holds particles, making them significantly more effective than traditional cleaning materials.

For best results, maintain separate cloths for different areas (kitchen, bathroom, general living spaces) to prevent cross-contamination. Invest in professional-grade microfiber with at least 200,000 fibers per square inch for optimal cleaning power. These systems are not only efficient but also environmentally friendly, as they reduce the need for chemical cleaners and paper towels.

Professional microfiber cleaning tools and equipment set
Collection of high-quality microfiber cleaning tools including cloths in different colors, mops, and dusters arranged professionally

Specialized Cleaning Tools

When it comes to professional home staging, having the right specialized cleaning tools can make all the difference in achieving that pristine, show-ready finish. A telescoping duster with microfiber attachments is essential for reaching high corners, ceiling fans, and crown molding without leaving any traces of dust. For deep carpet cleaning, consider investing in a commercial-grade extractor that removes embedded dirt and refreshes fibers to their original appearance.

Window cleaning becomes effortless with a professional-grade squeegee system, complete with extension poles for those hard-to-reach exterior panes. A steam cleaner with various attachments proves invaluable for sanitizing and refreshing upholstery, curtains, and grout lines without harsh chemicals.

Don’t overlook the importance of specialized brushes, such as grout brushes, detail brushes for fixtures, and radiator brushes for those often-forgotten spaces. A high-quality HEPA vacuum with attachments designed for different surfaces ensures thorough cleaning of baseboards, stairs, and tight corners.

For stubborn spots and stains, keep a selection of specialized cleaning tools like melamine foam erasers, grout pens, and detail scrubbers. These professional-grade tools might cost more initially but deliver superior results that can significantly impact a property’s presentation and ultimate selling price.

Storage and Organization Solutions

Keep your home staging cleaning supplies organized and easily accessible with a systematic storage approach. Use clear, stackable containers to categorize supplies by room or purpose, and label everything clearly to save time during the staging process. A portable cleaning caddy is essential for moving efficiently between rooms, holding frequently used items like glass cleaner, microfiber cloths, and all-purpose sprays.

Install adjustable shelving in a dedicated closet or laundry room to maximize vertical storage space. Store heavy items at waist level to prevent strain, and keep potentially hazardous chemicals on higher shelves away from children and pets. Consider using drawer organizers or small bins to separate sponges, cloths, and brushes.

Create a cleaning supply inventory checklist and mount it inside your storage area. This helps track when items need replacement and ensures you’re always prepared for staging appointments. For frequently staged properties, maintain separate sets of supplies for each location, stored in clearly marked totes for quick transport.

Implement a “first in, first out” rotation system for products with expiration dates, and regularly assess your supplies to dispose of expired or unused items properly.

Room-by-Room Cleaning Supply Checklist

Kitchen and Bathroom Essentials

When preparing kitchens and bathrooms for home staging, it’s essential to use commercial-grade cleaning supplies that deliver professional results. These high-traffic areas require special attention as they significantly influence buyers’ impressions.

For kitchens, start with a heavy-duty degreaser to tackle accumulated cooking residue on cabinets, backsplashes, and appliances. Choose a professional-grade all-purpose cleaner with natural orange oil for effective grease cutting without harsh chemical odors. A specialized stainless steel cleaner is crucial for achieving that showroom-worthy shine on appliances.

In bathrooms, focus on products that eliminate soap scum, hard water stains, and mildew. A commercial-grade bathroom cleaner with mold-inhibiting properties is essential. Invest in a professional lime and calcium remover for fixtures and glass shower doors. Don’t forget a quality toilet bowl cleaner that removes stains and mineral deposits.

For both areas, keep these essential tools on hand:
– Microfiber cloths for streak-free surfaces
– Heavy-duty scrub brushes
– Non-scratch scouring pads
– Extension poles for hard-to-reach areas
– Grout brushes for detailed cleaning

Remember to choose products with neutral or light fresh scents, as strong chemical odors can be off-putting to potential buyers. Always test cleaning products on a small, inconspicuous area first to ensure they won’t damage surfaces. Keep these supplies separate from regular household cleaners to maintain their professional-grade effectiveness.

Before and after comparison of a professionally cleaned staged kitchen
Before and after split image of a staged kitchen showing cleaning transformation with cleaning supplies visible in the foreground

Living Areas and Bedrooms

For living areas and bedrooms, maintaining a pristine appearance is crucial, especially when staging condos for sale or showcasing larger homes. Start with a high-quality microfiber duster set for reaching ceiling fans, light fixtures, and baseboards without leaving residue. A professional-grade vacuum with HEPA filtration is essential for deep-cleaning carpets and upholstery, while a steam cleaner can refresh fabric surfaces and remove stubborn stains.

Keep glass cleaner and lint-free cloths handy for mirrors, picture frames, and window surfaces. Anti-static furniture polish helps maintain wooden surfaces while repelling dust, making staged rooms stay cleaner longer. For bedrooms, invest in a mattress refresher spray and fabric deodorizer to ensure spaces smell fresh and inviting.

Don’t forget specialized tools like extendable cobweb dusters for high corners and ceiling edges. A good supply of microfiber cleaning cloths in different colors helps prevent cross-contamination between surfaces. For quick touch-ups between showings, keep an electrostatic floor mop and furniture wipes readily available.

Remember to stock up on gentle, unscented all-purpose cleaners that won’t overwhelm potential buyers with strong fragrances. These living spaces should feel clean and welcoming without any harsh chemical smells that might distract from the home’s natural appeal.

Cost-Effective Purchasing Strategies

Bulk Buying Benefits

When it comes to cost-effective home staging, buying cleaning supplies in bulk can significantly reduce your expenses while ensuring you never run short during crucial staging preparations. Wholesale purchases often result in savings of 20-30% compared to retail prices, making it a smart investment for regular home stagers.

Consider joining wholesale clubs or establishing relationships with commercial cleaning supply distributors. Many offer business memberships that provide access to professional-grade products at discounted rates. Focus on purchasing frequently used items like all-purpose cleaners, glass sprays, and microfiber cloths in larger quantities.

To maximize bulk buying benefits, create a detailed inventory system to track usage and prevent overbuying. Store supplies properly in a cool, dry place to maintain their effectiveness. Share bulk purchases with other stagers or real estate professionals to split costs and minimize storage needs. Remember to compare unit prices rather than package prices to ensure you’re getting the best value, and watch for seasonal sales when suppliers often offer additional discounts on larger orders.

Where to Source Supplies

For professional-grade home staging cleaning supplies, several reliable sourcing options are available. Major home improvement retailers like Home Depot and Lowe’s offer comprehensive selections of cleaning products and tools at competitive prices. These stores often provide bulk purchasing options, which can be cost-effective for regular home stagers.

Professional cleaning supply distributors, such as Grainger and HD Supply, specialize in commercial-grade products and frequently offer wholesale pricing. These vendors typically provide detailed product information and expert guidance for specific cleaning challenges.

Online marketplaces like Amazon Business and Uline have become increasingly popular for sourcing cleaning supplies, offering convenient delivery and competitive pricing. Many of these platforms provide business accounts with additional benefits, including quantity discounts and scheduled deliveries.

Local janitorial supply stores are another excellent resource, offering personalized service and expert product recommendations. These establishments often carry professional-grade products not readily available in retail stores and can provide valuable advice on proper product usage and applications.

For eco-friendly and specialized cleaning products, consider suppliers like Green Cleaning Products LLC or EcoLogic Solutions, which focus on environmentally conscious cleaning solutions perfect for modern home staging needs.

Professional cleaning supplies are the backbone of successful home staging, playing a crucial role in creating that pristine, move-in ready appearance that buyers crave. By investing in quality cleaning products and tools, you’re not just cleaning a space – you’re crafting an environment that speaks to potential buyers’ desires for a well-maintained home.

Remember that the right cleaning supplies do more than just remove dirt; they help create the perfect first impression, eliminate odors, and highlight your property’s best features. From eco-friendly all-purpose cleaners to specialized surface treatments, each product in your staging toolkit contributes to the overall success of your presentation.

The impact of proper cleaning supplies extends beyond aesthetics. Professional-grade products help protect your investment by safely maintaining different surfaces while ensuring the home remains in top condition throughout the showing period. They also save time and effort by delivering superior results with fewer applications, making them a cost-effective choice in the long run.

As you prepare your property for the market, consider your cleaning supplies as essential marketing tools. Just as professional photographers use quality equipment to capture your home’s best angles, professional cleaning supplies help showcase your property’s true potential. By maintaining high cleaning standards with the right products, you’re not just selling a house – you’re selling the promise of a fresh start in a perfectly maintained home.

10 Expert Tips for Designing a Vape-Friendly Interior in Your House

Creating a vape-friendly environment in your home involves thoughtful design choices that enhance your vaping experience while maintaining a stylish and functional living space. Whether you are an avid vaper or just looking to accommodate guests who vape, there are a handful of things you can do to design your interiors to be both comfortable and aesthetically pleasing. For those looking to explore a variety of quality vaping products to enhance this environment, visiting https://bargainejuice.ca/ can offer a wide selection of options that cater to both beginner and experienced vapers alike.

Without further ado, here are 10 expert tips you can follow to make your interiors as vape-friendly as possible:

Prioritize Proper Ventilation

One of the most important aspects of a vape-friendly home is proper ventilation.

Good airflow ensures that vapor does not linger, keeping your space fresh and odor-free. Installing exhaust fans in areas where you vape frequently, such as living rooms or dedicated vape lounges, can be highly effective.

Air purifiers with HEPA filters are also a good investment as they can efficiently remove vapor particles from the air.

Additionally, regularly opening windows and doors to let fresh air in can prevent vapor buildup, making your space more comfortable.

Choose Easy-to-Clean Surfaces

Vaping can leave a slight residue on surfaces over time, so selecting materials that are easy to clean is essential for maintaining a pristine environment.

Hardwood floors are a great option as they are easy to clean and do not trap vapor residue like carpets do. Leather furniture is another excellent choice because it is less likely to absorb vapor smells and can be wiped down easily.

For walls, consider using glossy or semi-gloss paint finishes, as they are easier to wipe clean than matte finishes.

Incorporate Stylish Storage Solutions

Keeping your vaping gear organized and accessible is crucial for a neat and stylish space. Integrating dedicated storage solutions into your design can help achieve this.

Custom cabinets with compartments for vape devices, e-liquids, and accessories can keep everything tidy and out of sight when not in use. Decorative trays on coffee tables or side tables can organize vape gear while adding a touch of style to your space.

Wall shelves are another option, as they can display your vape collection attractively and keep it within easy reach.

Optimize Lighting

Lighting can significantly impact the ambiance of your vape-friendly space.

Proper lighting enhances visibility and creates a relaxing atmosphere. Using a combination of ambient, task, and accent lighting can create a versatile and inviting environment. Installing dimmer switches allows you to adjust the brightness according to your mood and activity.

LED lights are a good choice due to their energy efficiency and ability to highlight specific areas, such as your vape station.

Select Vapor-Resistant Fabrics

Fabrics in a vape-friendly home should be resistant to absorbing vapor and odors. Choosing the right textiles can help maintain a fresh atmosphere. Microfiber is a synthetic fabric that is durable, easy to clean, and resists absorbing odors. Leather and faux leather are also good choices as they are less likely to retain smells and can be wiped clean easily.

Additionally, consider using outdoor fabrics indoors; they are designed to resist moisture and are easy to clean, making them ideal for a vaping environment.

Designate a Vaping Zone

Creating a specific area in your home for vaping can help contain vapor and maintain cleanliness throughout the rest of the house.

Ensure the area includes comfortable seating, such as cozy chairs or a sofa, to make the space inviting. Adequate ventilation is crucial, so consider installing an exhaust fan or using an air purifier in the designated vaping zone.

Decorating the space with artwork, plants, and other personal touches can make it a pleasant retreat and enhance your overall vaping experience.

Use Air Fresheners and Scent Diffusers

Maintaining a pleasant aroma in your home can enhance the vaping experience. Air fresheners and scent diffusers can help neutralize any lingering odors. Essential oil diffusers provide a natural and continuous way to keep your space smelling fresh.

Scented candles are another option; choose candles with scents that complement your vaping flavors.

Automatic air fresheners can also be effective as they release bursts of fragrance at regular intervals to maintain a pleasant smell.

Embrace Greenery

Indoor plants can improve air quality and add a touch of natural beauty to your vape-friendly home. They can also help absorb some of the vapor.

Spider plants are known for their air-purifying qualities and are easy to care for, making them a great choice. Aloe vera can help filter the air and add a modern touch to your decor. Peace lilies not only look elegant but also help improve air quality, making them an excellent addition to your vaping area.

Consider Acoustic Panels

If you enjoy vaping while listening to music or watching movies, improving the acoustics of your space can enhance the experience. Acoustic panels can reduce echo and improve sound quality. Installing acoustic panels on walls can absorb sound and enhance audio clarity.

Adding carpets or rugs can help dampen sound and add comfort to your space. Heavy curtains can also improve sound quality while adding a decorative element to your room.

Personalize Your Space

Finally, personalizing your vape-friendly interior with items that reflect your style and interests can make it truly feel like home.

Decorate with artwork and photos that resonate with you and your lifestyle. Creating a custom vape station with unique features like built-in charging ports and display shelves can add a personal touch.

Including comfort items such as soft throws, cushions, and a good sound system can enhance your vaping experience and make your space more enjoyable.

Designing a vape-friendly interior is all about combining functionality with style. These expert tips ensure that your home remains fresh, clean, and stylish, providing a perfect backdrop for your vaping activities.

Whether you are setting up a dedicated vape lounge or simply making your living room more accommodating, these strategies will help you achieve a harmonious and vape-friendly interior.

Should You Invest in a Condo?

Investing in real estate is a significant decision that requires careful consideration of various factors. Condominiums, or condos, present a popular investment option for many individuals.

Before diving into the real estate market, it’s essential to weigh the pros and cons to determine if a condo is the right investment for you.

Is a Condo a Worthwhile Investment?

The viability of a condo as an investment property hinges on its location, a factor that greatly influences its potential for attracting visitors or long-term tenants.

Condos typically come at a lower price point than single-family homes, making them an accessible entry point for property investment. The affordability is particularly advantageous for managing monthly upkeep, especially during periods without tenants.

Condo associations, while offering certain benefits, can pose restrictions, such as limitations on renting out your property. It’s crucial to verify these rules before purchasing. Some associations mandate a percentage of owner-occupied units, aiming to ensure better property maintenance and higher values.

If permitted to rent, this can be advantageous for your property’s value and tenant satisfaction due to overall improved building upkeep.

Pros of Investing in a Condo

If you’re considering investing in a condo property, here are its upsides that you’d want to think about:

Affordability and Accessibility

Condos are often more affordable than standalone houses, making them an attractive option for first-time investors. They provide an opportunity for homeownership at a lower cost, and many condos are even located in urban areas.

Maintenance Convenience

One of the significant advantages of condo living is that maintenance responsibilities, such as landscaping and exterior repairs, are typically managed by the condominium association.

This can be especially beneficial for individuals with busy lifestyles or those who prefer a hands-off approach to property maintenance.

Amenities and Shared Facilities

Condos often come with shared amenities like swimming pools, fitness centers, and communal spaces. These facilities enhance the overall living experience and can be a selling point when attracting tenants or potential buyers.

Shared expenses for these amenities are typically covered by the condo association fees.

Security and Community Living

Condo communities often have security measures in place, such as gated access or on-site security personnel. This can provide a sense of safety for residents. Additionally, the close proximity of neighbors in a condo complex fosters a sense of community.

Cons of Investing in a Condo

However, it’s worth noting that investing in a condo is not without its drawbacks. Without further ado, here are the downsides of investing in one:

Homeowners Association (HOA) Fees

Condo owners are required to pay monthly HOA fees to cover the maintenance of common areas and amenities. These fees can vary widely and may increase over time, impacting the overall cost of ownership.

It’s crucial to factor in these ongoing expenses when assessing the affordability of a condo.

Limited Control Over Property

Condo owners have limited control over decisions affecting the property. The condo association, comprised of elected representatives, makes decisions on behalf of the community. This lack of control can be a drawback for those who prefer autonomy in managing their property.

Resale Challenges

The resale value of condos may be influenced by factors beyond the owner’s control, such as the overall market conditions and the financial health of the condominium association. Selling a condo could take longer compared to a standalone house, depending on the demand in the local real estate market.

Space Limitations

Condos typically offer less space compared to houses, which may be a disadvantage for those requiring more room or families with children.

Limited storage space and shared walls may also lead to noise-related issues.

The Key Takeaway

Investing in a condo can be a lucrative option, especially if you’re seeking an affordable, low-maintenance lifestyle with added amenities.

However, it’s crucial to carefully evaluate the associated costs, restrictions, and potential limitations to ensure that a condo aligns with your financial goals and lifestyle preferences.

Short on Budget? Here are 8 Tips to Stage Your House without Spending Too Much

Selling your house doesn’t have to break the bank. With a few savvy strategies, you can effectively stage your home on a budget and attract potential buyers without draining your wallet.

If you find yourself short on budget, here are 9 simple and cost-effective tips to make your property shine:

Declutter and Depersonalize

Start by removing excess items to create an open, spacious feel. This involves packing away personal items like family photos and mementos. A clutter-free space allows potential buyers to focus on the features of the home rather than distractions.

This fosters a neutral environment that appeals to a broader range of tastes.

Deep Clean

A thorough cleaning is paramount. Scrub surfaces, clean carpets, and polish fixtures. A spotless home suggests meticulous care, instilling confidence in potential buyers. A well-maintained property not only looks better but also communicates a sense of value and reliability.

Clever Furniture Arrangement

Work with the existing furniture to showcase the home’s layout and maximize space. Rearranging furniture strategically can create a more open and inviting atmosphere, making rooms appear larger.

Removing bulky items can further contribute to a sense of spaciousness and improve the overall flow of your house.

Neutral Color Palette

Repainting with neutral colors like whites and grays provides a clean slate for potential buyers. A neutral palette appeals to a broader audience, allowing them to visualize their furnishings and style in the space.

It’s a cost-effective way to update your home’s appearance and create a modern, inviting ambiance.

Enhance Curb Appeal

Boost the curb appeal by tending to the exterior. Mow the lawn, trim bushes, and apply a fresh coat of paint to the front door.

These simple steps create an inviting entrance and set a positive tone for prospective buyers. It also makes them more likely to view the property with enthusiasm.

Strategic Lighting

Use natural light to your advantage by opening curtains and blinds during showings. Additionally, consider adding affordable lighting fixtures strategically to brighten darker areas. Proper lighting enhances the overall atmosphere and creates a warm and inviting environment that leaves a lasting impression on potential buyers.

Accessorize Minimally

Thoughtfully chosen accessories can enhance the home’s aesthetic. However, it’s crucial not to overdo it. Minimalistic accessorizing, such as adding a few tasteful decorations or accent pieces, allows the property to shine without overwhelming potential buyers.

The goal is to create a polished, yet uncluttered look.

DIY Repairs

Address minor repairs promptly to convey a well-maintained property. Fixing issues like leaky faucets, squeaky doors, and loose cabinet handles signals to buyers that the home has been cared for.

DIY repairs are not only cost-effective but also contribute to the overall impression of a property that is move-in ready.

Utilize Low-Cost Staging Tricks

Employing budget-friendly staging techniques can enhance the overall appeal. Consider placing fresh flowers in key areas, displaying a bowl of fruit in the kitchen, or adding new, inexpensive linens to bedrooms.

These small touches create a welcoming atmosphere without a significant financial investment, making the property more attractive to potential buyers.

Conclusion

Staging your house on a budget is about presenting a clean, well-maintained, and neutral space that allows potential buyers to see the full potential of the property.

By implementing these straightforward tips, you can increase your home’s appeal without stretching your finances. It also increases the likelihood of a successful and lucrative sale.

Tips for Selling Your House During a Divorce

Divorce is undoubtedly a challenging and emotional process, and selling a house during this time can add an extra layer of complexity. To help you with that, we have prepared a practical guide on how to navigate the sale of a house during a divorce.

Let’s get started.

Communication is Key

Despite the emotional strain, open communication with your soon-to-be-ex-spouse is crucial. Both parties need to be on the same page regarding the decision to sell the house.

You should agree on the sale price, timeline, and any financial constraints that may impact the process. Setting clear goals and expectations helps streamline the selling process.

Create a Plan for House Preparation

Recognize that preparing a house for sale takes time.

Throughout the process, make sure to develop a plan outlining necessary repairs, renovations, and upgrades to maximize the property’s value. Addressing issues like repairs, cleaning, and improvements before listing the house can enhance its market appeal.

Collaborate with your ex-spouse to create a calendar, assigning tasks and setting deadlines for each aspect of the preparation.

Consider Necessary Repairs and Upgrades

Assess the condition of the house and prioritize necessary repairs. Ensure that critical issues, such as structural problems or code violations, are addressed promptly. Additionally, discuss and agree on desired upgrades that could increase the home’s resale value.

Simple updates, like fresh paint, can significantly impact the overall appeal of the property.

Explore the Property Concierge Program

To simplify the process of covering renovation costs, consider leveraging services like the ones we offer. This allows you to renovate the home before selling without any upfront expenses. The program handles the costs of updates, and you only pay when the house is sold, streamlining the financial aspect of the selling process.

Work with a Reliable Realtor

Engage the services of an experienced realtor who specializes in divorce real estate transactions. A skilled realtor can guide you through potential challenges, provide market insights, and help navigate negotiations.

Choose someone who understands the emotional sensitivity of the situation and is committed to ensuring a smooth selling process.

Stick to the Plan

Once you have a cohesive plan in place, stick to it as closely as possible. Regularly review and adjust the plan if necessary, but having a roadmap helps both parties stay focused and committed to the agreed-upon goals.

Flexibility is key, but having a plan provides a sense of structure in an otherwise emotionally charged situation.

Be Prepared for Market Changes

Realize that the real estate market can be unpredictable. While having a plan is essential, be prepared to adapt to changes in the market conditions. Work closely with your realtor to make informed decisions based on the current real estate landscape.

Final Thoughts

Selling a house during a divorce is undoubtedly a challenging endeavor, but with clear communication, careful planning, and professional assistance, the process can be more manageable.

By addressing financial and emotional aspects collaboratively, you can navigate the sale of the property with greater ease, allowing both parties to move forward in their respective lives.

A Quick Guide to Selling an Inherited House

Selling a house has its pros and cons, no matter where you live or what kind of house you have. But if you’re selling an inherited house, that can bring additional worries and concerns with it. Inherited houses may have will or title issues, and they also might need repair or renovation. Trying to sort through all of that may feel like it’s just too much.

While selling an inherited house can indeed be a complex process, with careful consideration and strategic steps, it can be more manageable. To help you with that, here are 5 practical tips you can follow to ease the process and ensure a smoother sale:

Clear Legal Channels

Verify the clarity of the will and legal documents related to the inherited property. Ensuring that the house is rightfully yours is crucial before investing time and effort into its sale. Address any potential issues related to the will or title to prevent complications during the selling process.

Handle Liens and Title Issues

Investigate past title issues, such as liens or other claims, that may be attached to the property. Clearing these concerns ensures a smooth transaction during the sale.

Be aware of any outstanding liens, as they can impact the final amount you receive as the seller. Addressing these issues early on will help avoid surprises later in the process.

Determine Current Market Value

Obtain an accurate understanding of the current market value of the inherited house. Seek professional opinions from appraisers or real estate agents to ensure you are well-informed when setting a selling price.

Utilizing services like the ones we offer here at Your Home Tour can provide you with estimated values before and after targeted renovations to help you make informed decisions.

Assess Necessary Repairs

Evaluate the condition of the inherited property and identify any needed repairs.

A pre-sale home inspection can uncover hidden issues that might affect the sale price. Focus on renovations that yield the highest return on investment. If you are reluctant to cover renovation costs upfront, consider options like working with a cash house buyer or leveraging programs where renovation costs are carried out until closing.

Seek Professional Guidance

Engage with trusted professionals throughout the selling process. Consult with realtors, appraisers, contractors, and knowledgeable friends to gain valuable insights and advice.

Leverage their expertise to make well-informed decisions, especially if you are navigating the process for the first time.

If you’re looking to simplify the selling process, our services can be your valuable resource. We at Your Home Tour will assess your property’s current value, recommend targeted renovations to increase its worth, and estimate the post-renovation resale value.

The unique aspect is that we will be the ones to cover renovation costs until the house is sold, eliminating the need for upfront payments and simplifying the overall transaction.

Selling an inherited house may involve challenges, but with careful planning and professional assistance, it can be a more streamlined and less stressful experience.